Withdraw an NFT
Overview
This guide describes how to use Ronin Bridge to send an NFT (non-fungible token) from your Ronin Wallet to an address on Ethereum.
Prerequisites
If you access Ronin Bridge through the Ronin Wallet mobile app, then you can only connect Ethereum wallets imported into your Ronin Wallet beforehand.
To import your Ethereum wallets, see Importing Your MetaMask Wallet to Ronin Wallet.
Step 1. Add the sender and recipient addresses
- Open Ronin Bridge and select the NFTs tab.
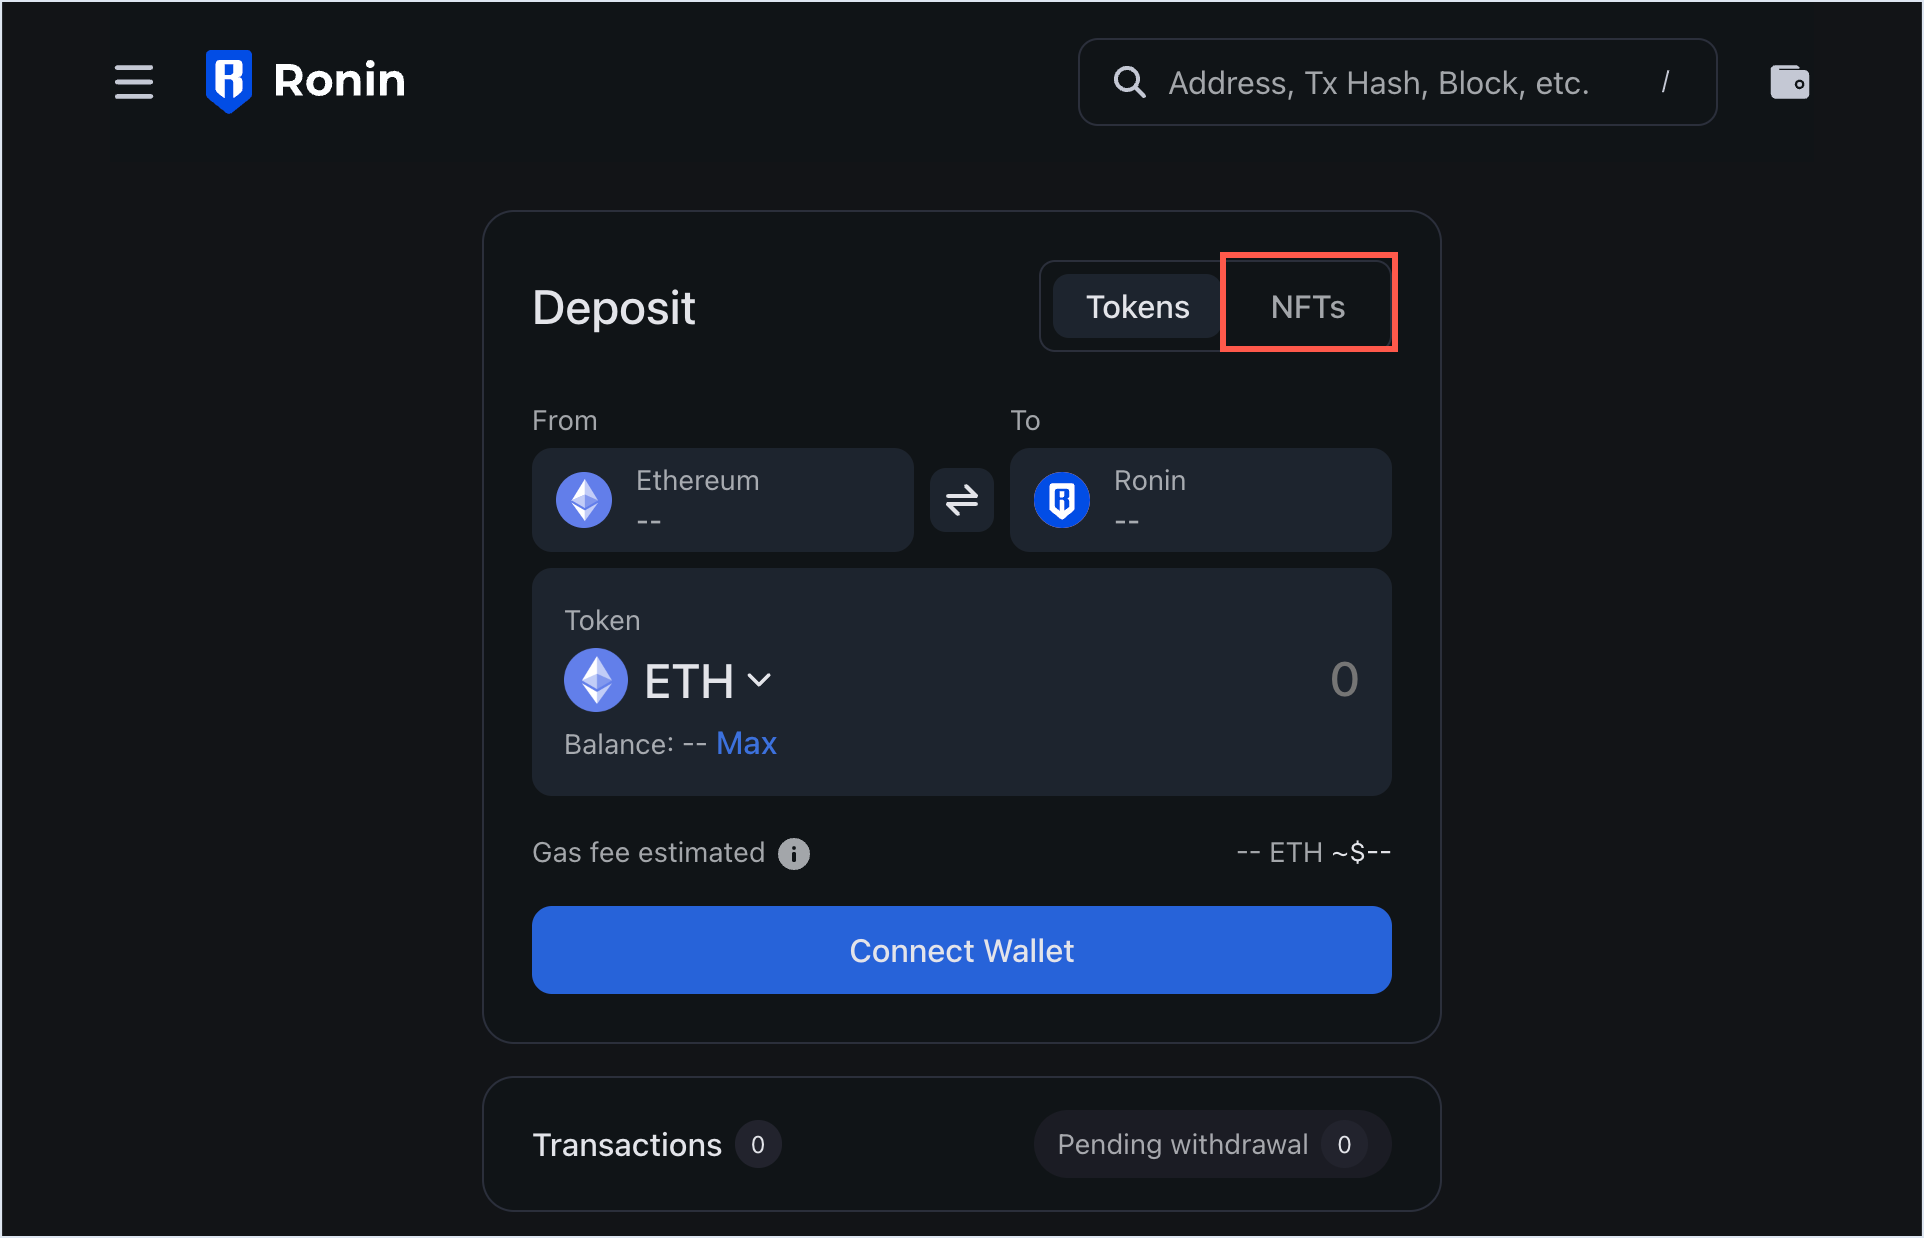
- Switch to the withdrawal feature by selecting the button between the From and To fields.
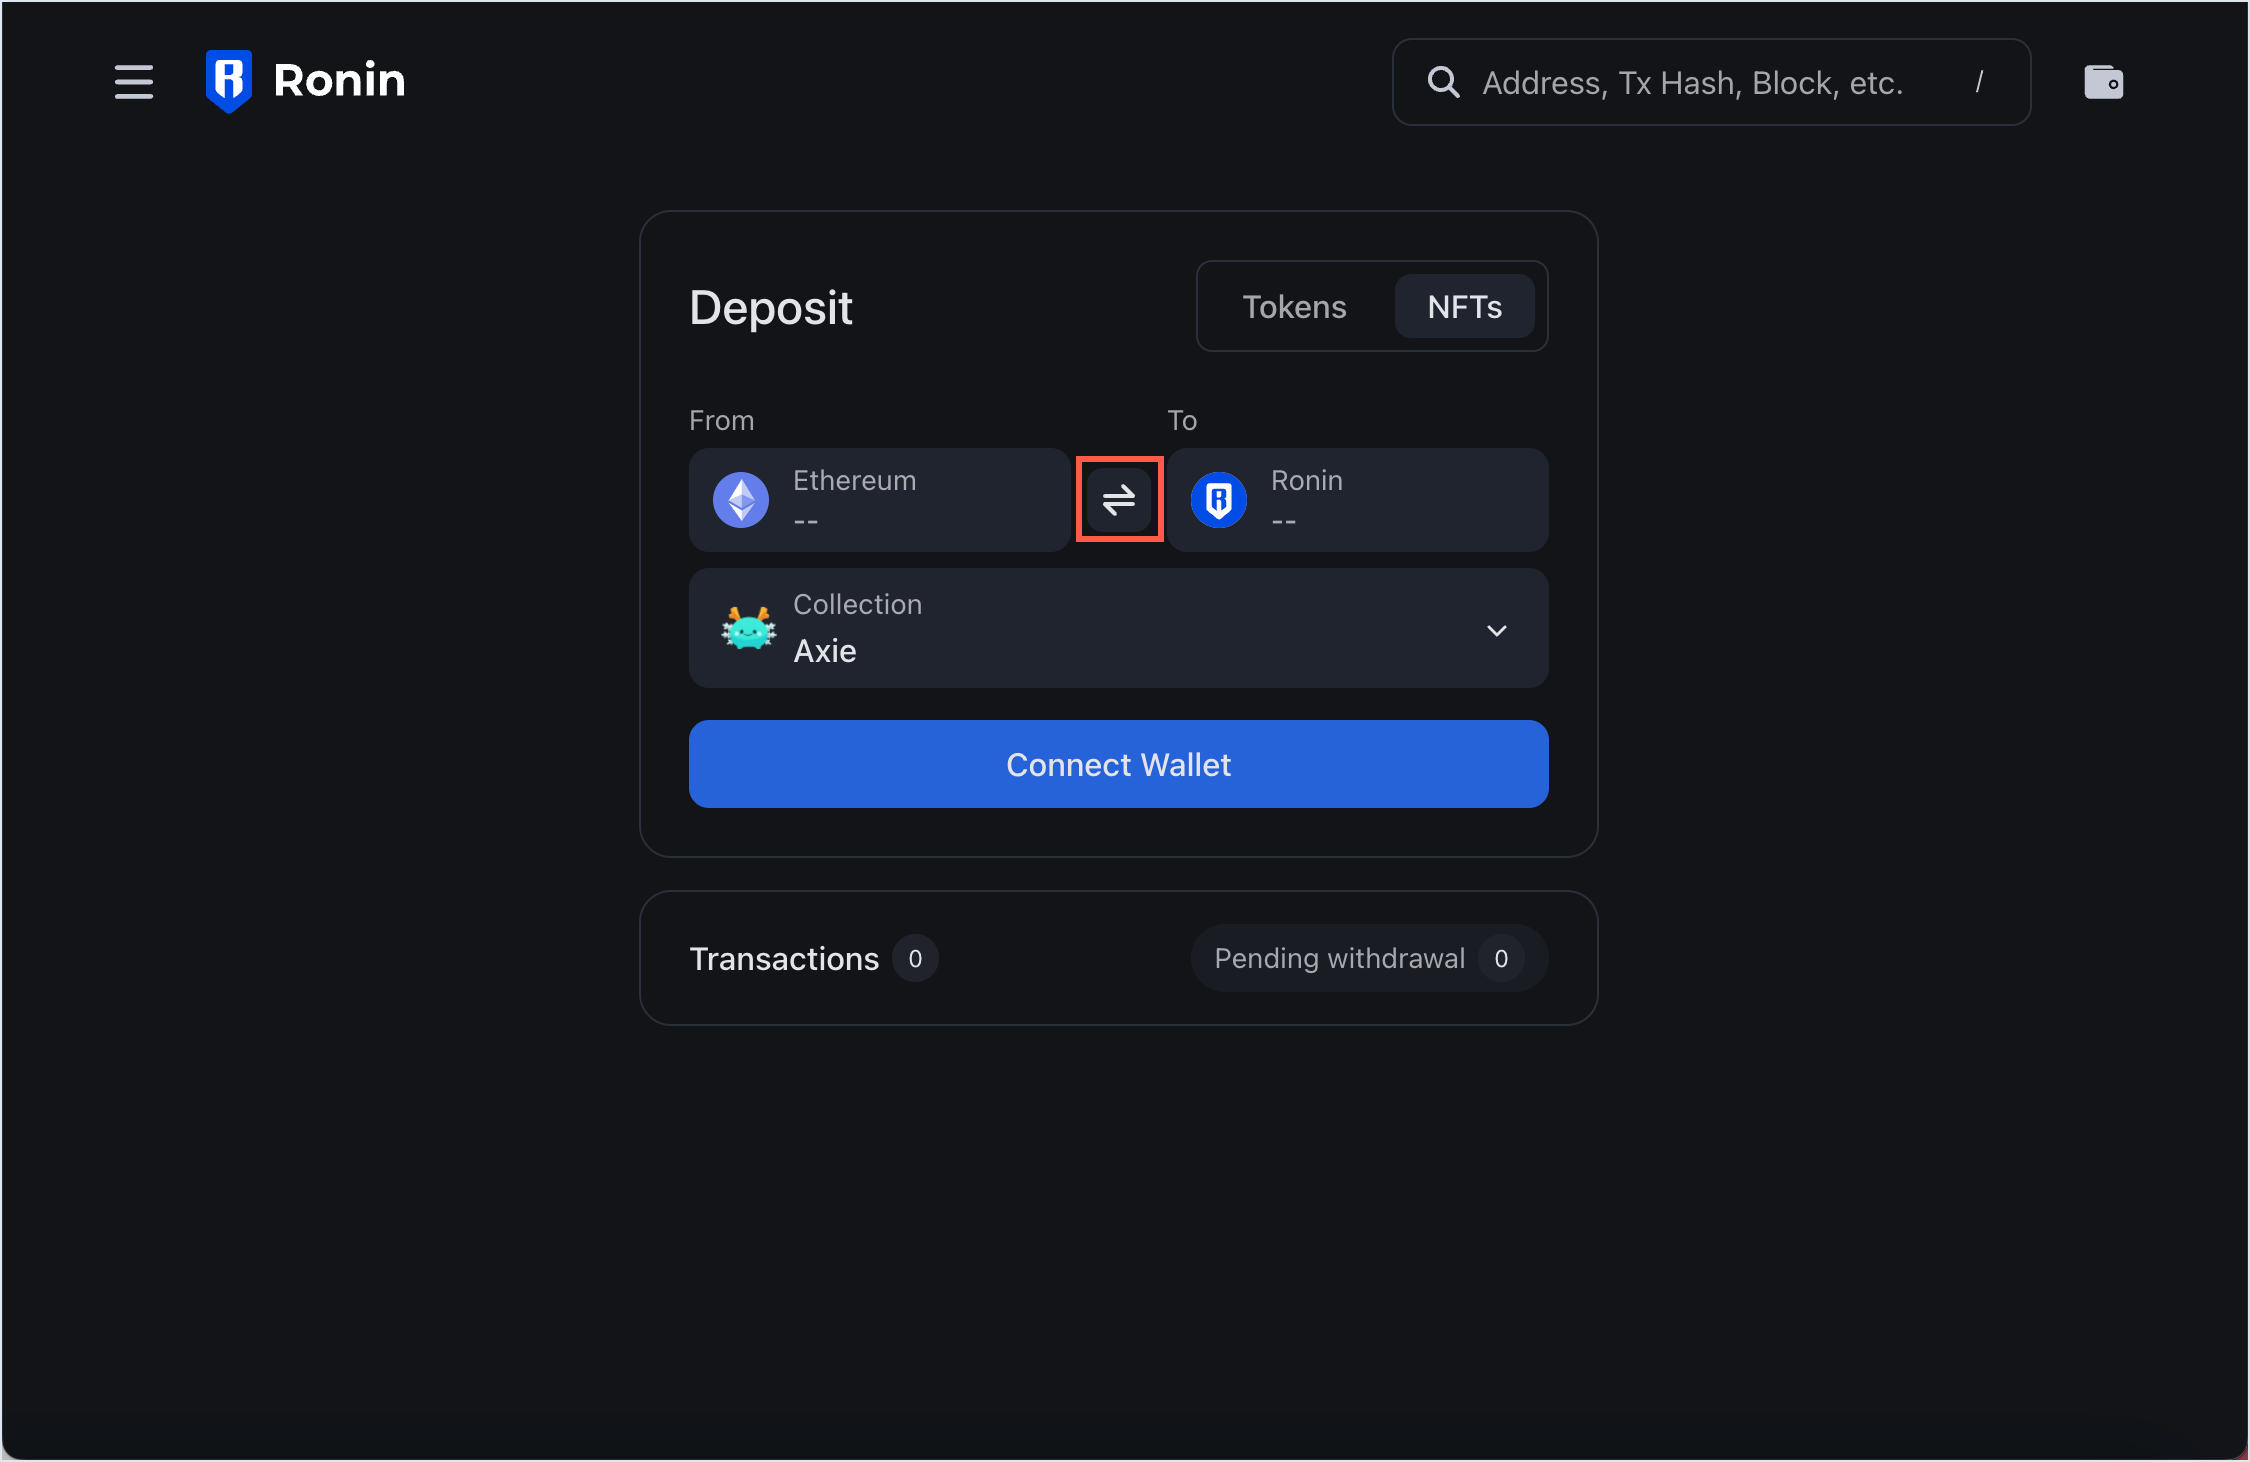
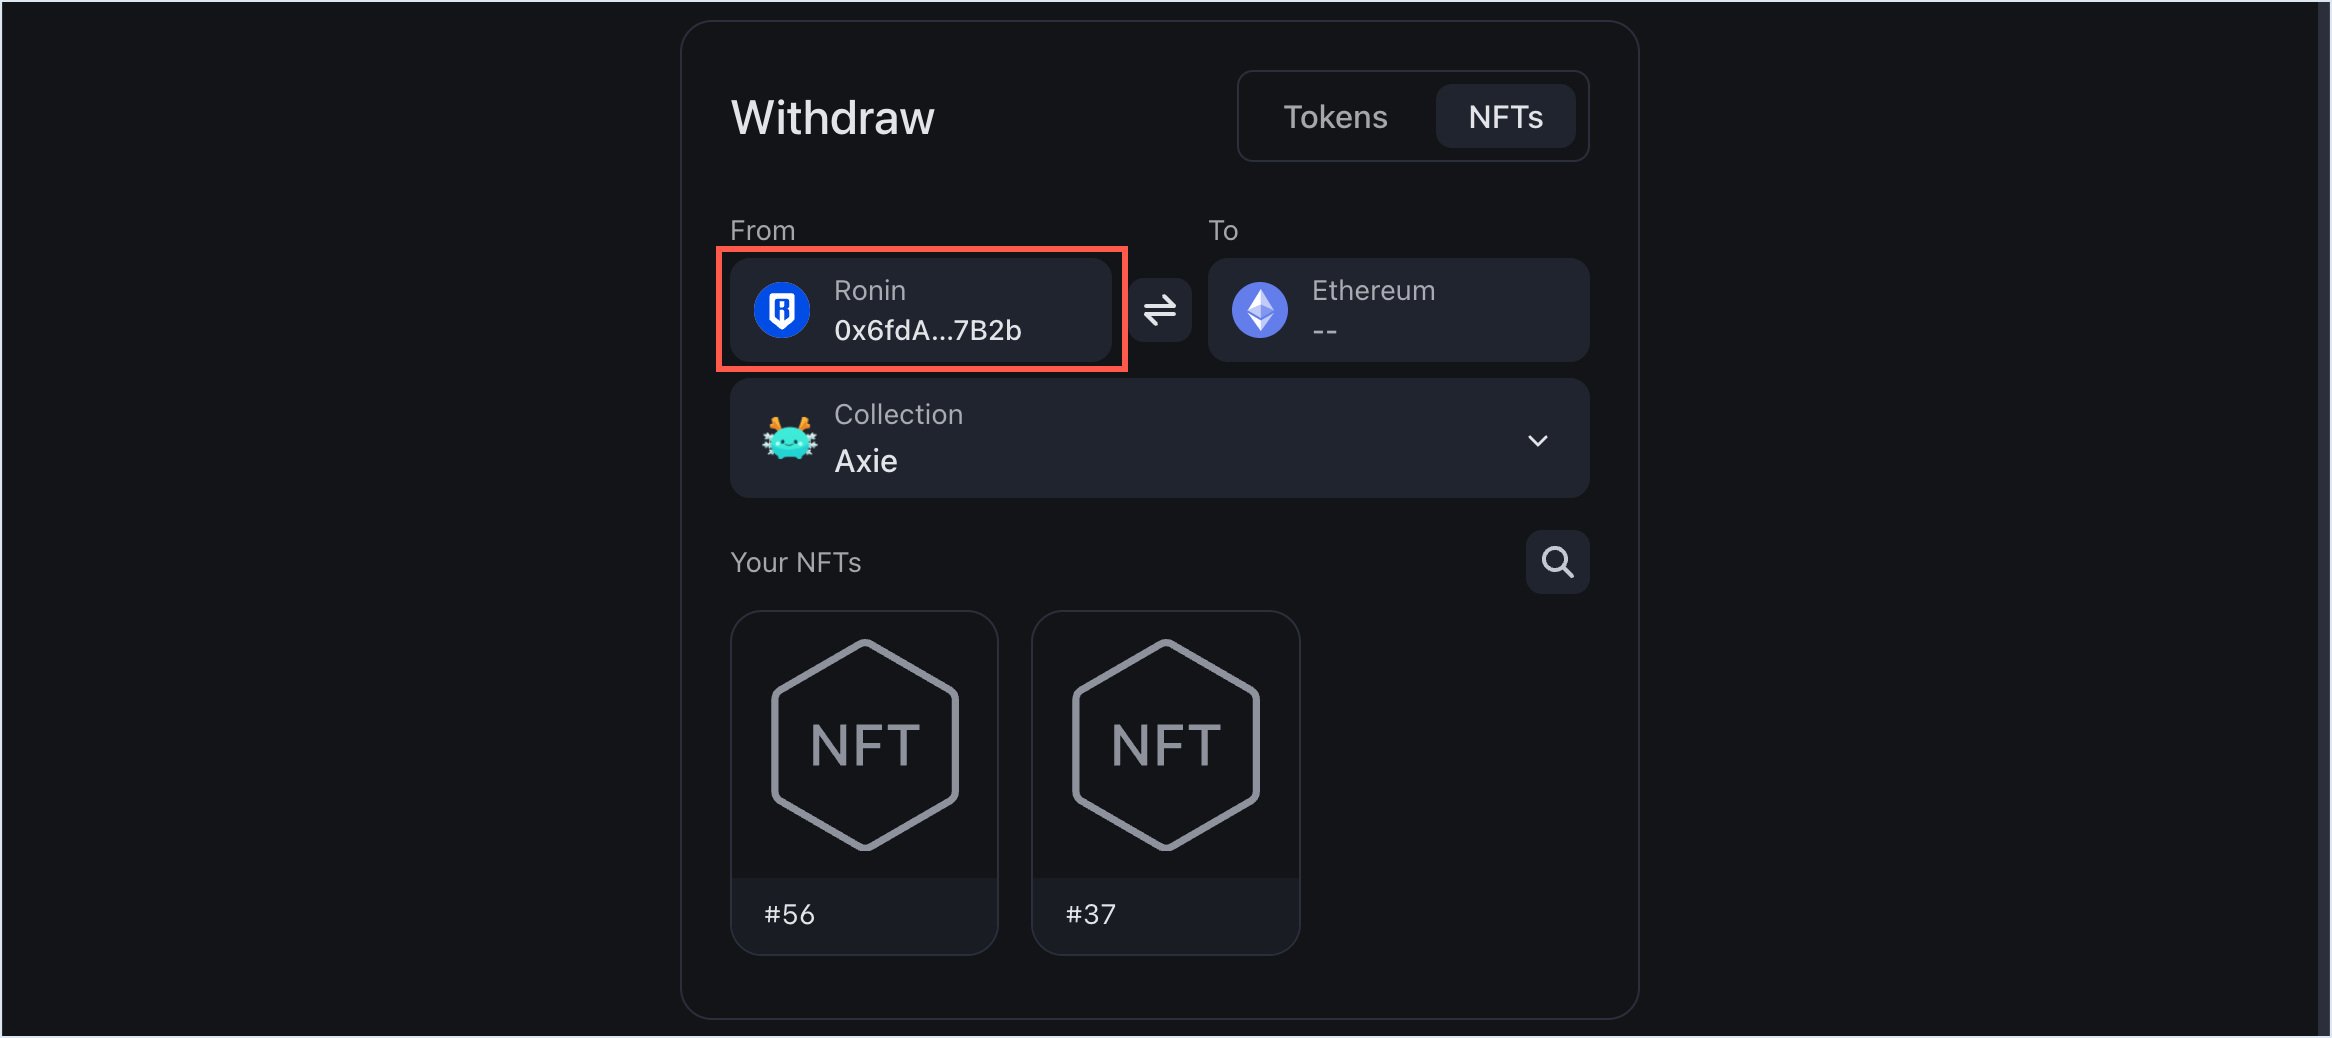
- In the From field, connect your Ronin Wallet using the browser extension or mobile app.
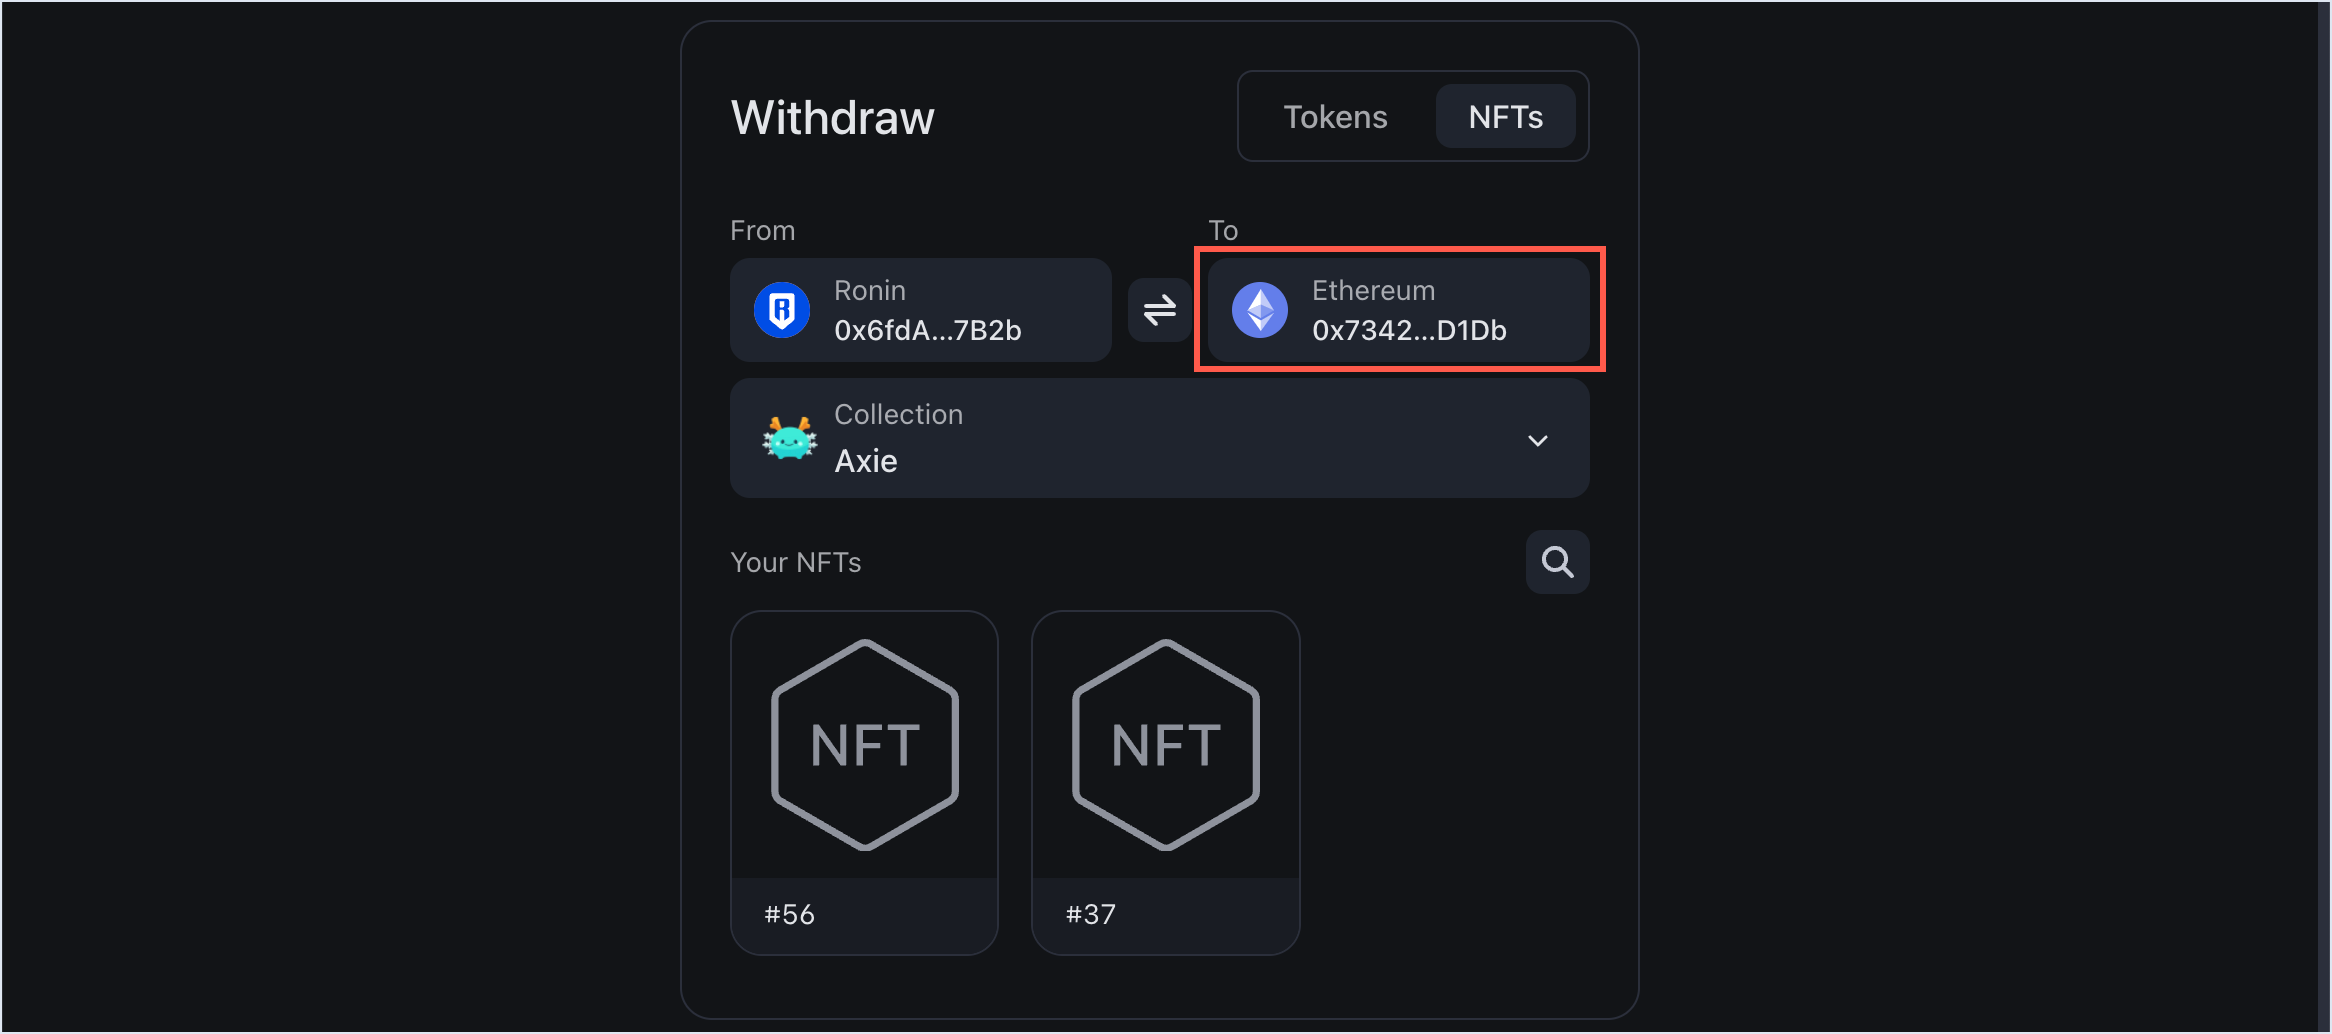
- In the To field, enter the Ethereum address that you want to transfer the NFT to. Double-check the recipient address to avoid sending your NFT to the wrong destination.
Ronin Wallet app
If you access Ronin Bridge through the Ronin Wallet mobile app, then you can enter any Ethereum address as a recipient, but only your imported Ethereum wallet can pay the gas fees for the transaction.
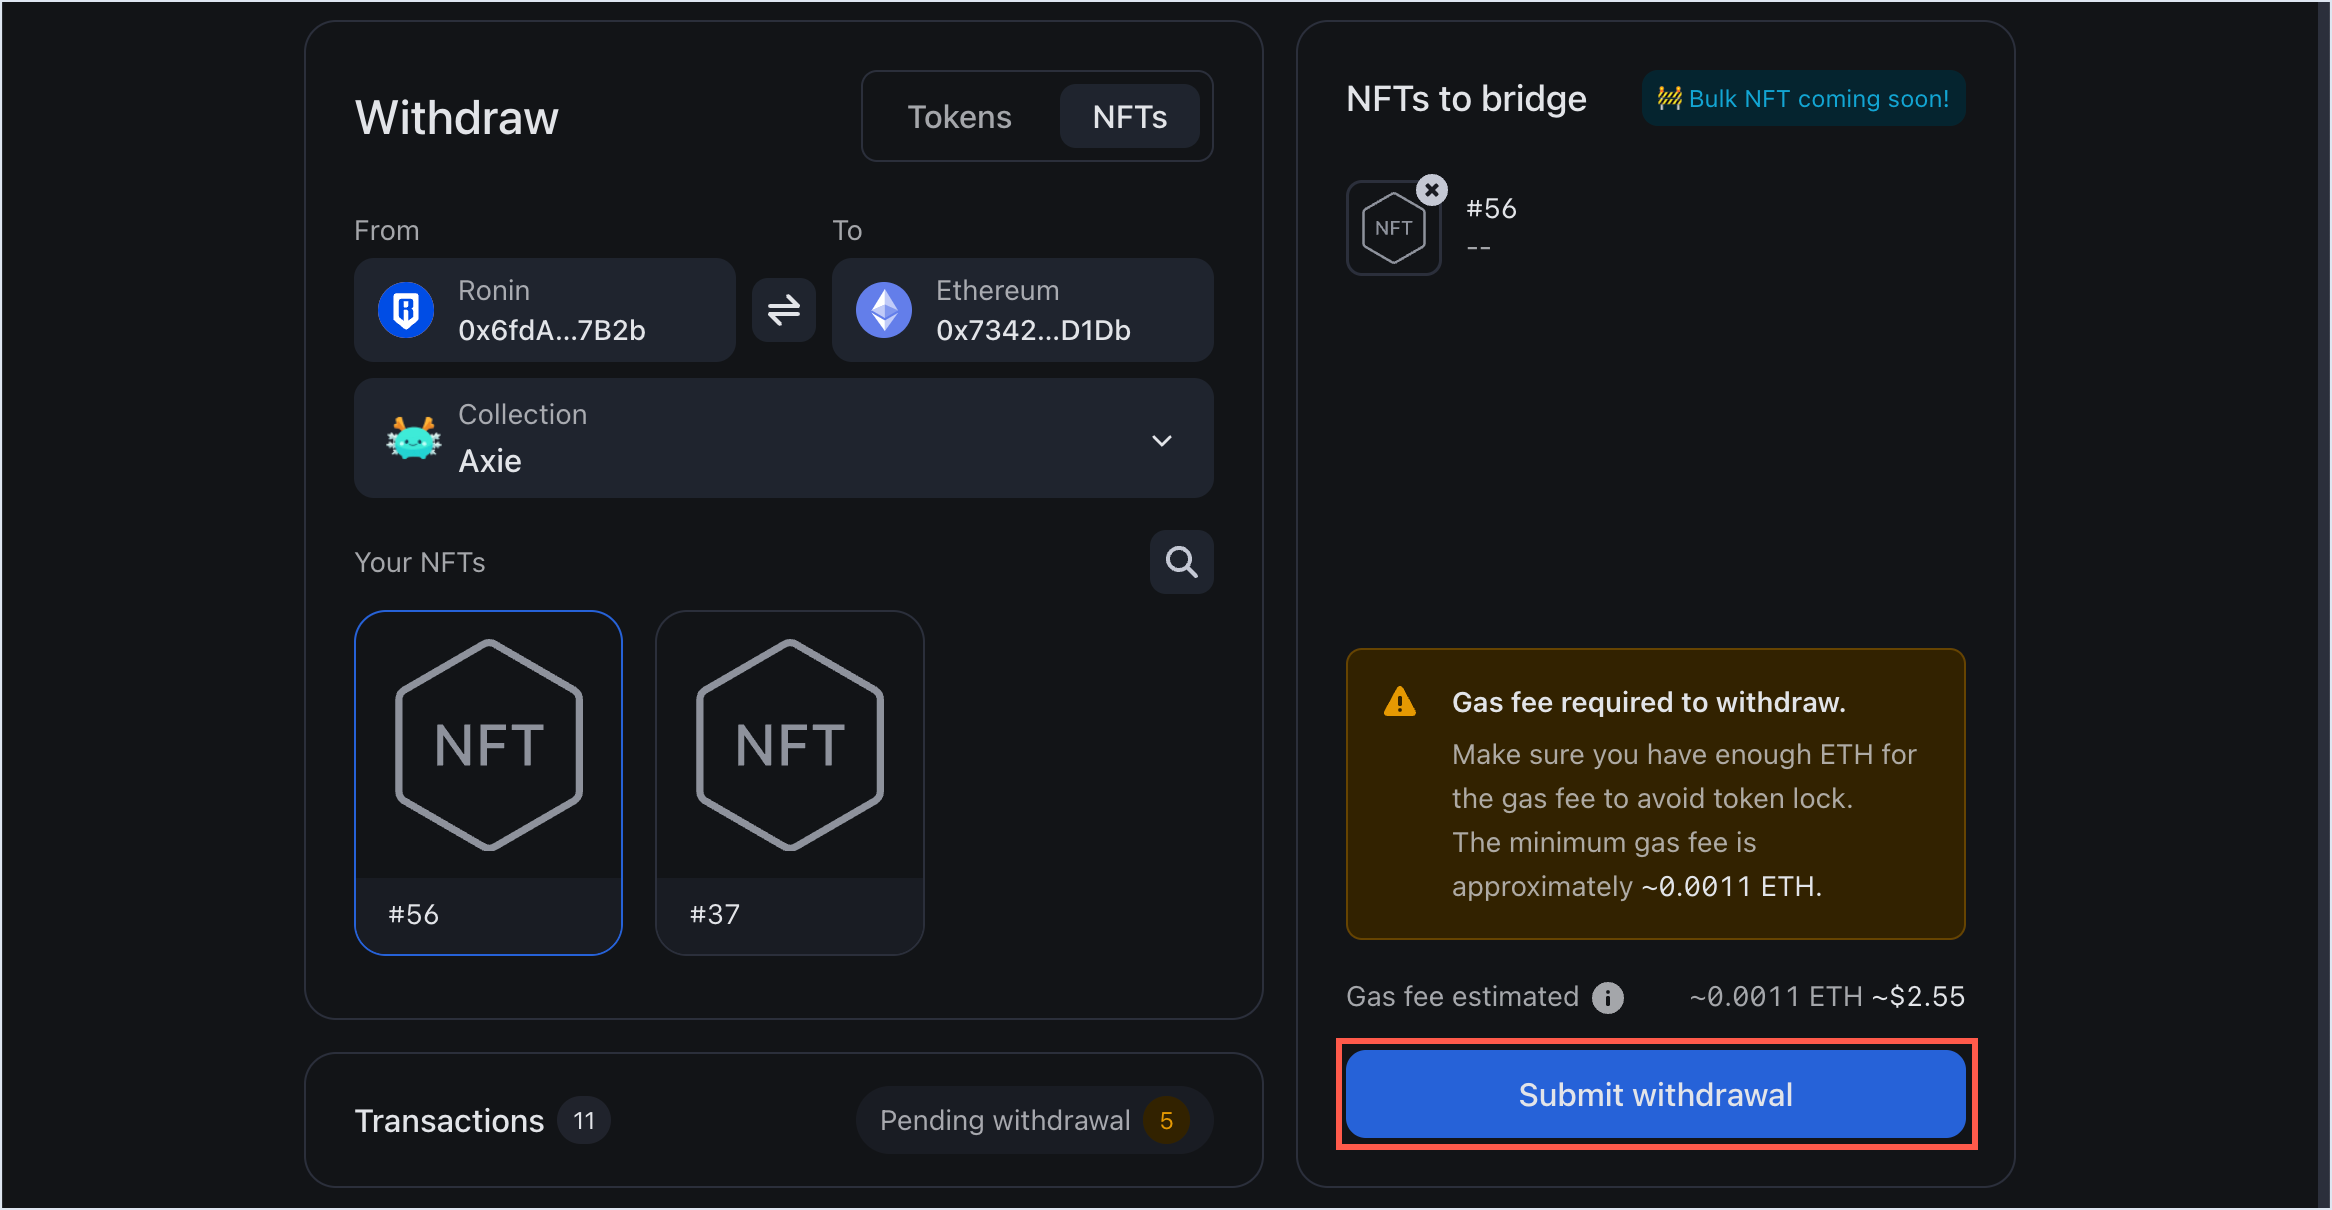
Step 2. Select the NFT to withdraw
- Choose the collection containing the NFTs you want to withdraw.
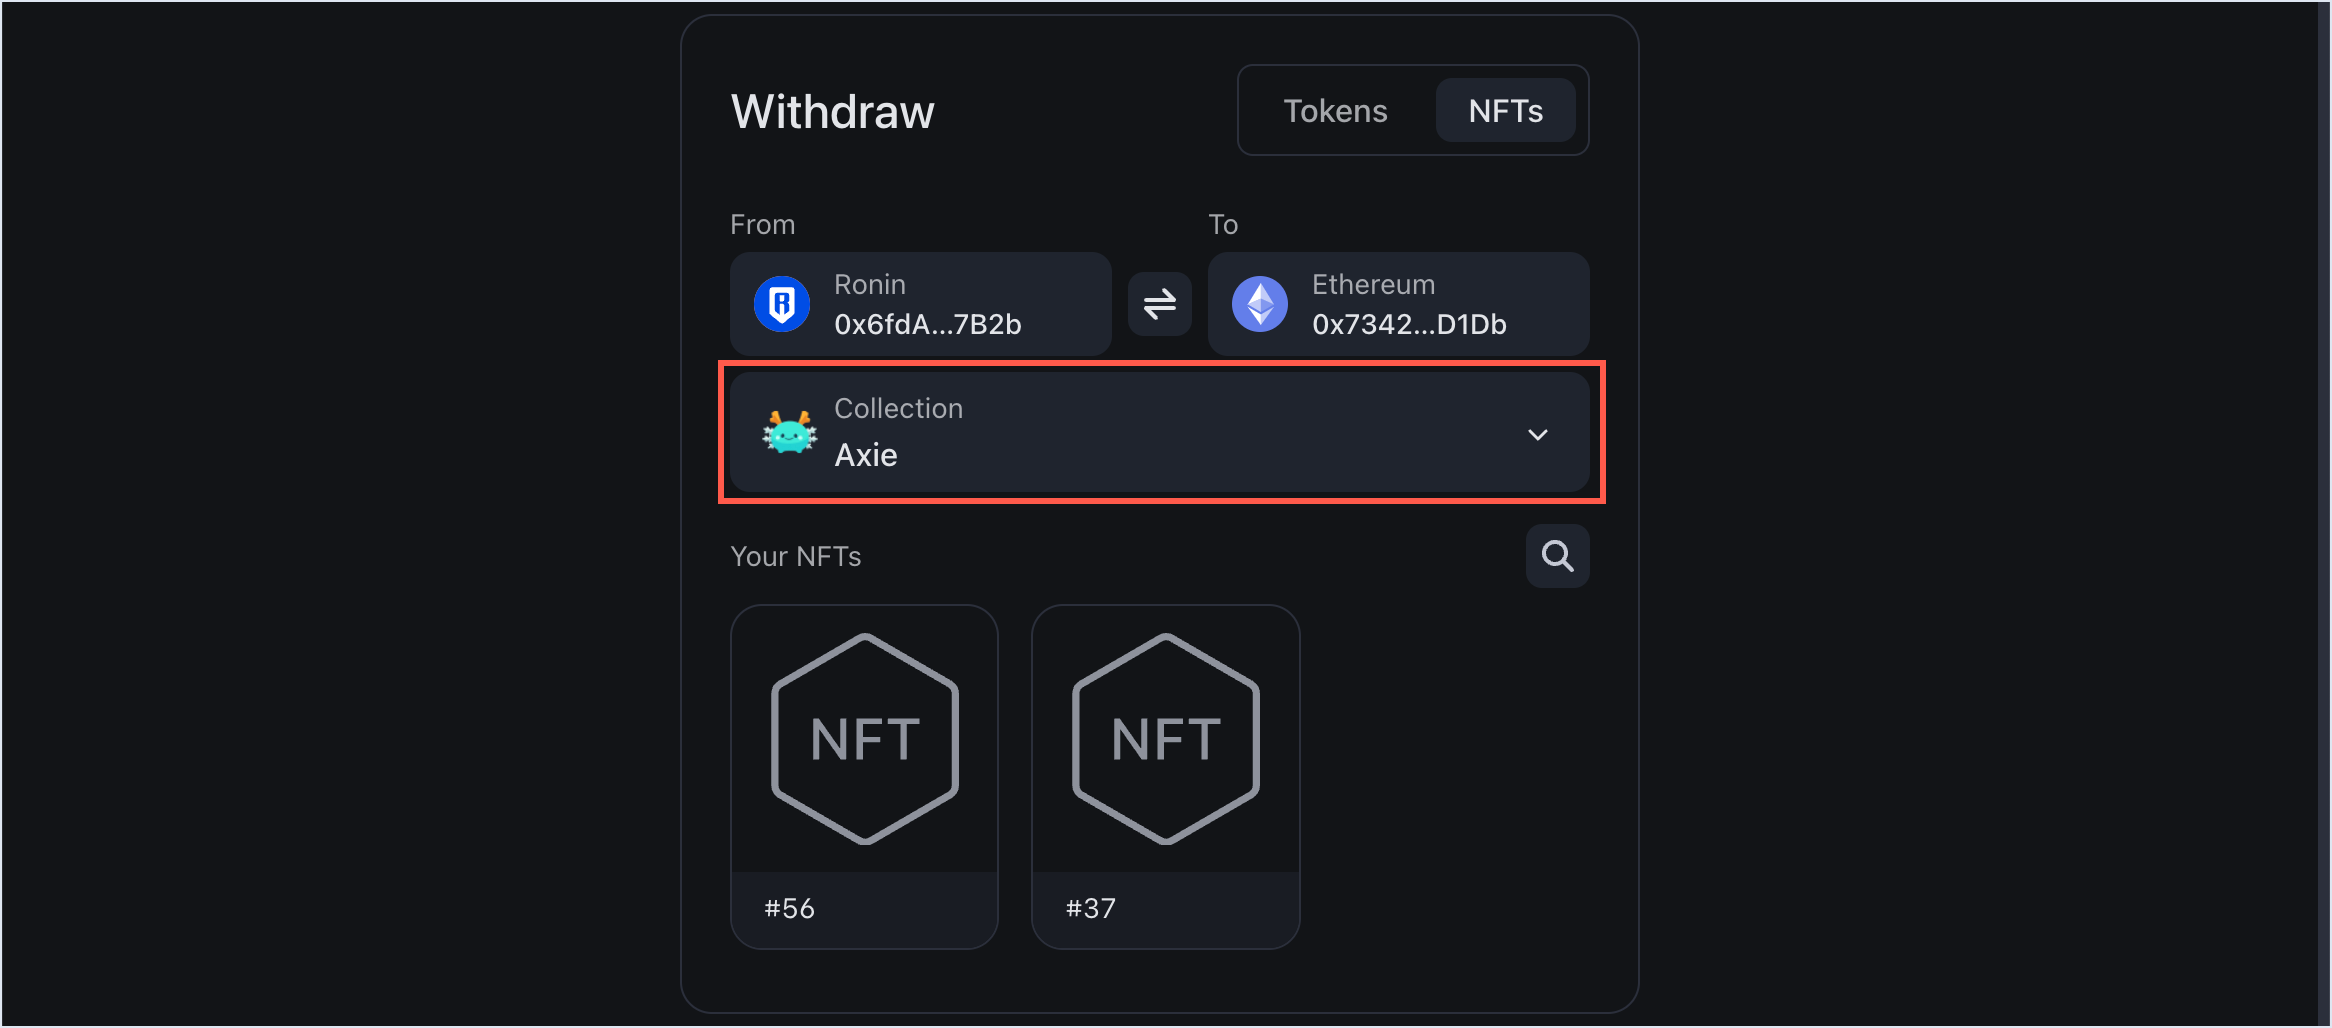
- In the collection, select the specific NFT.
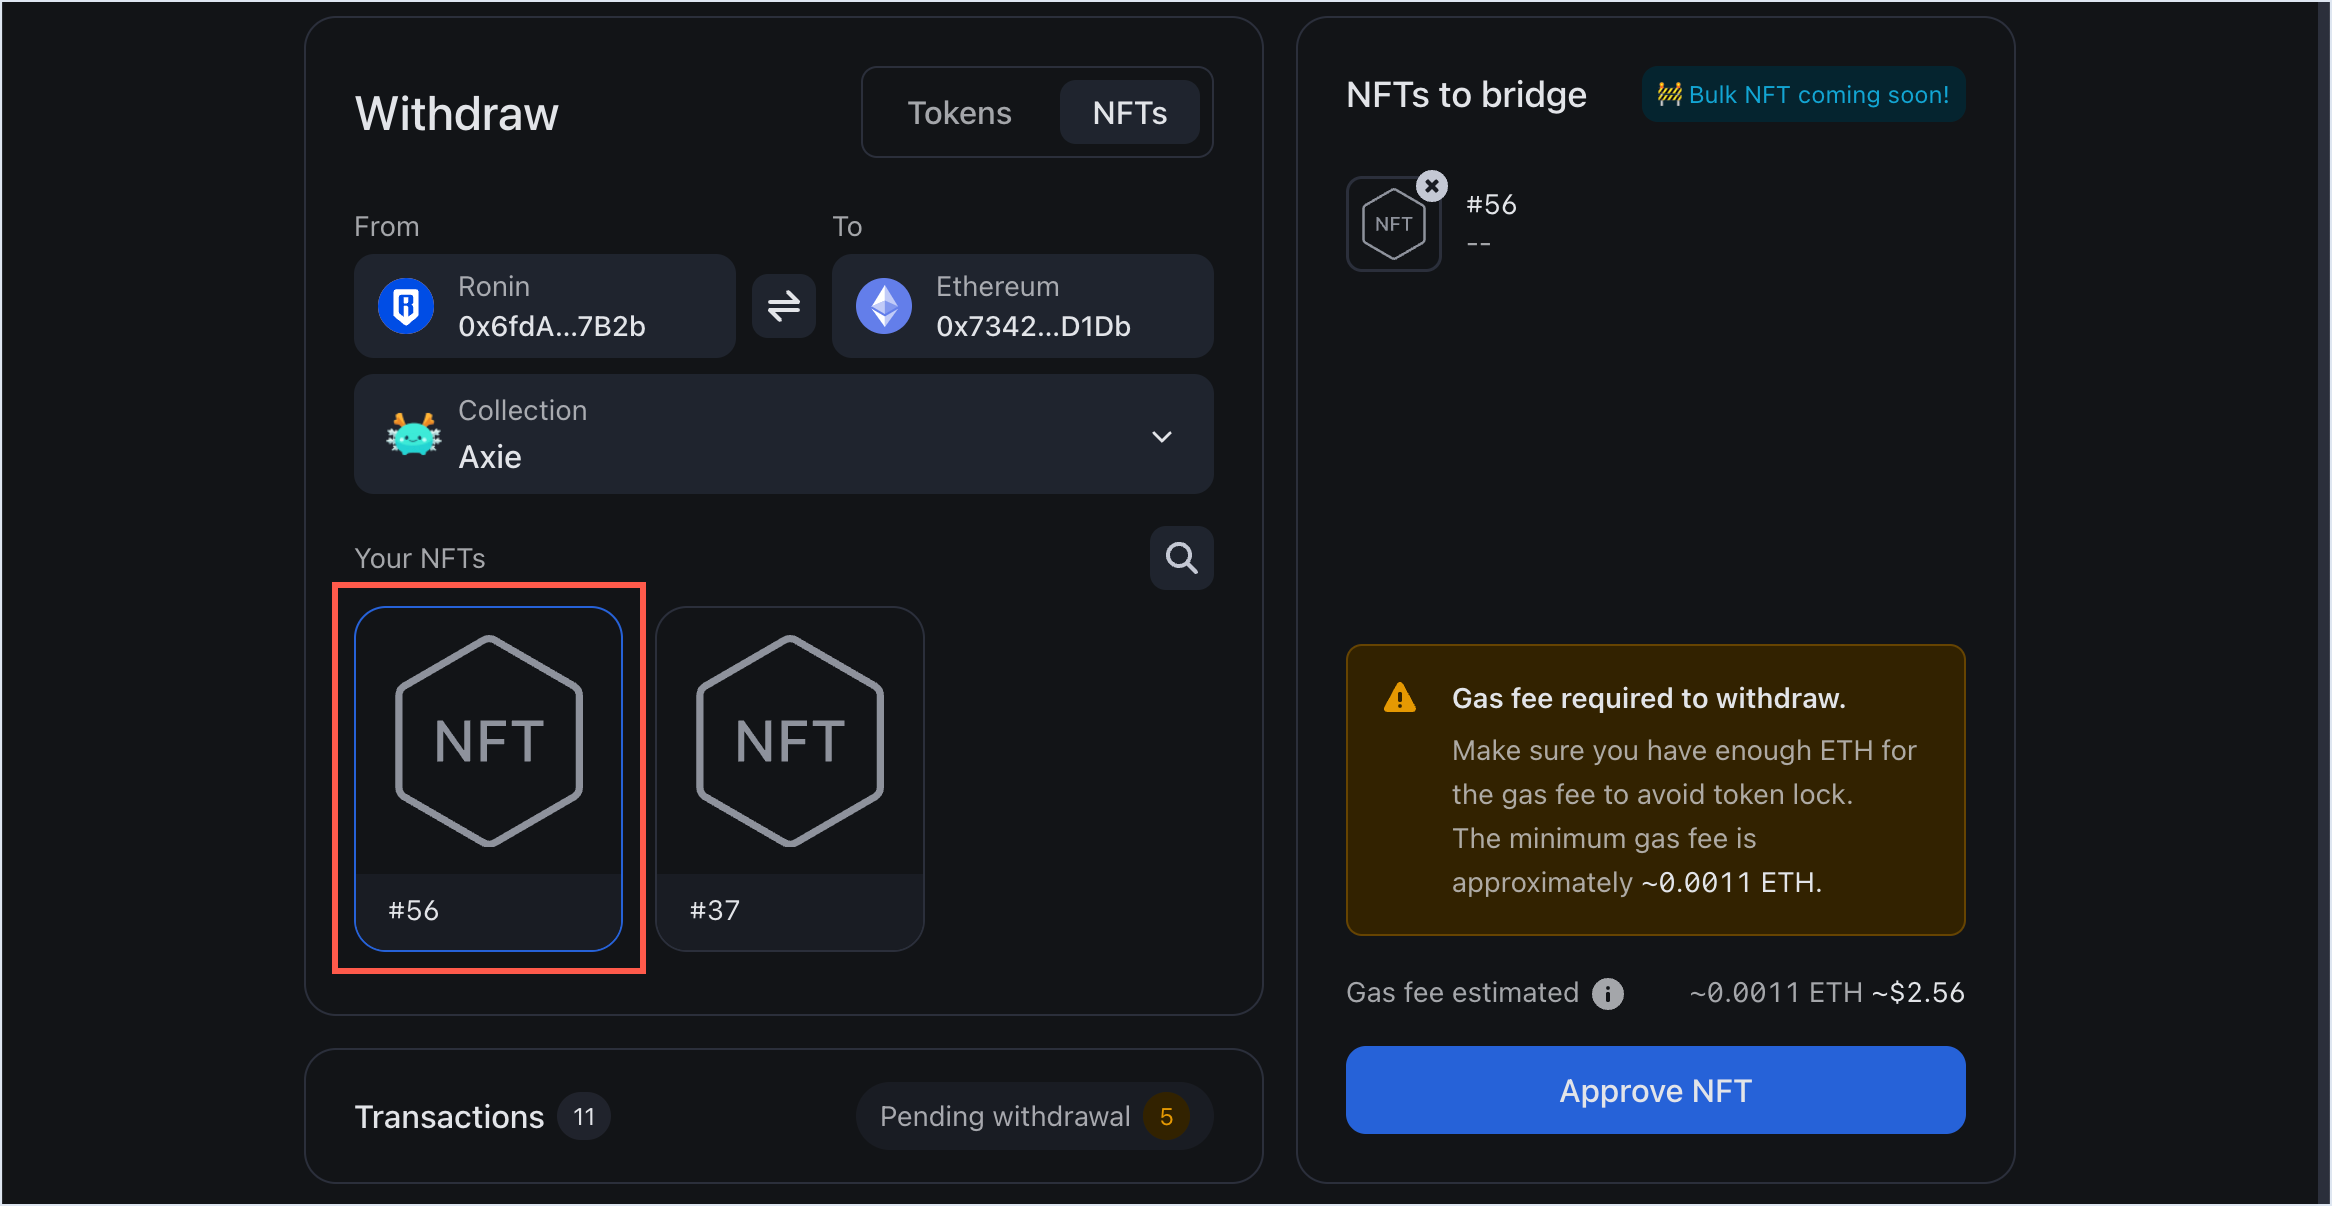
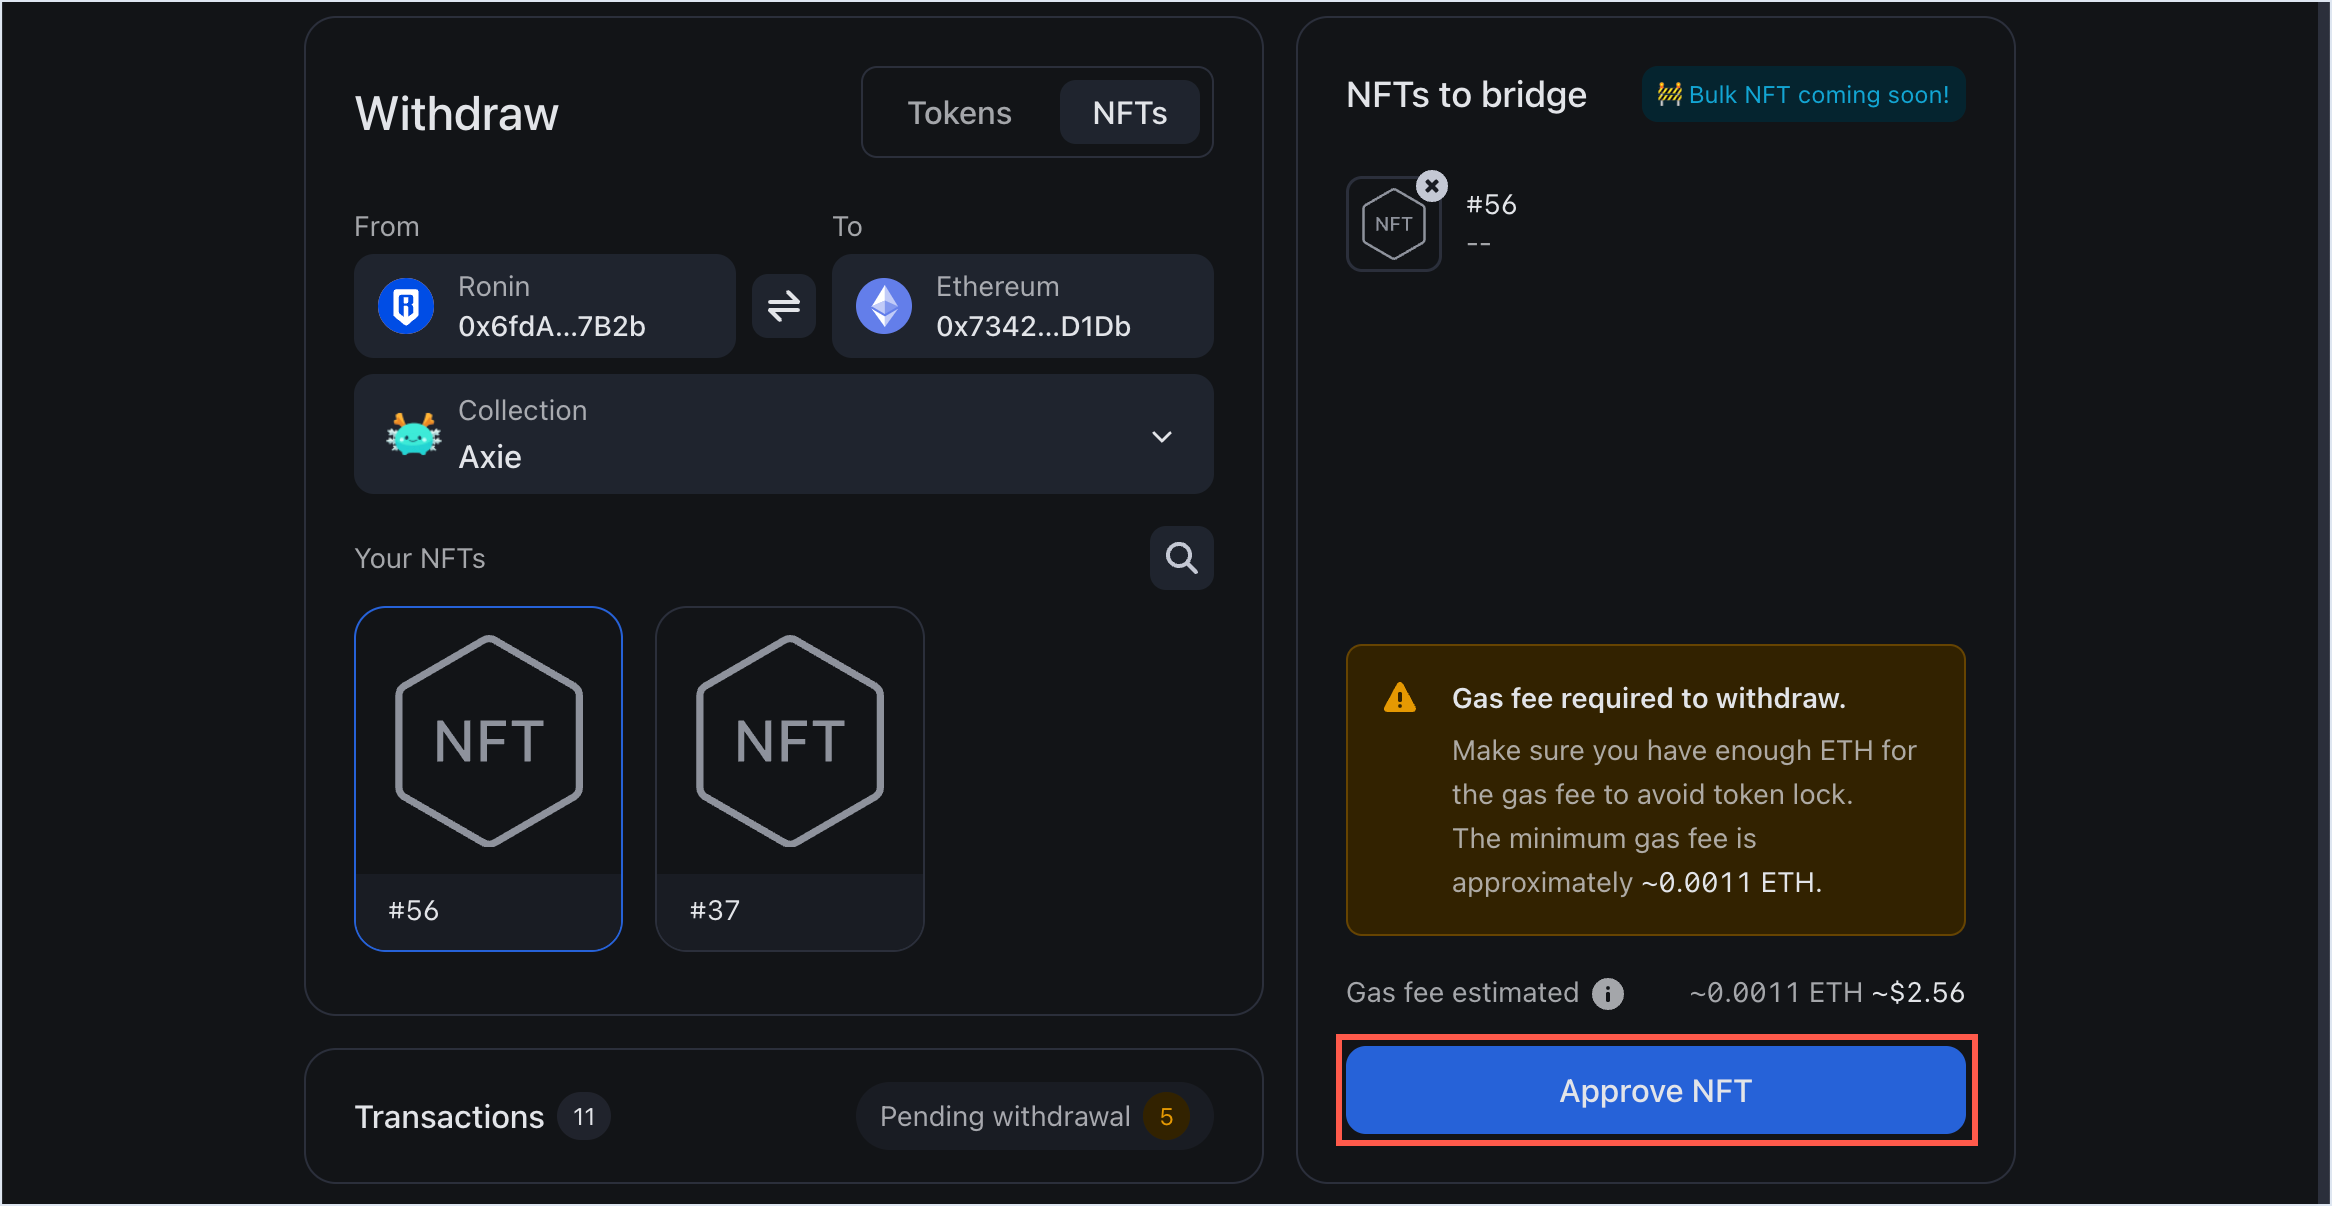
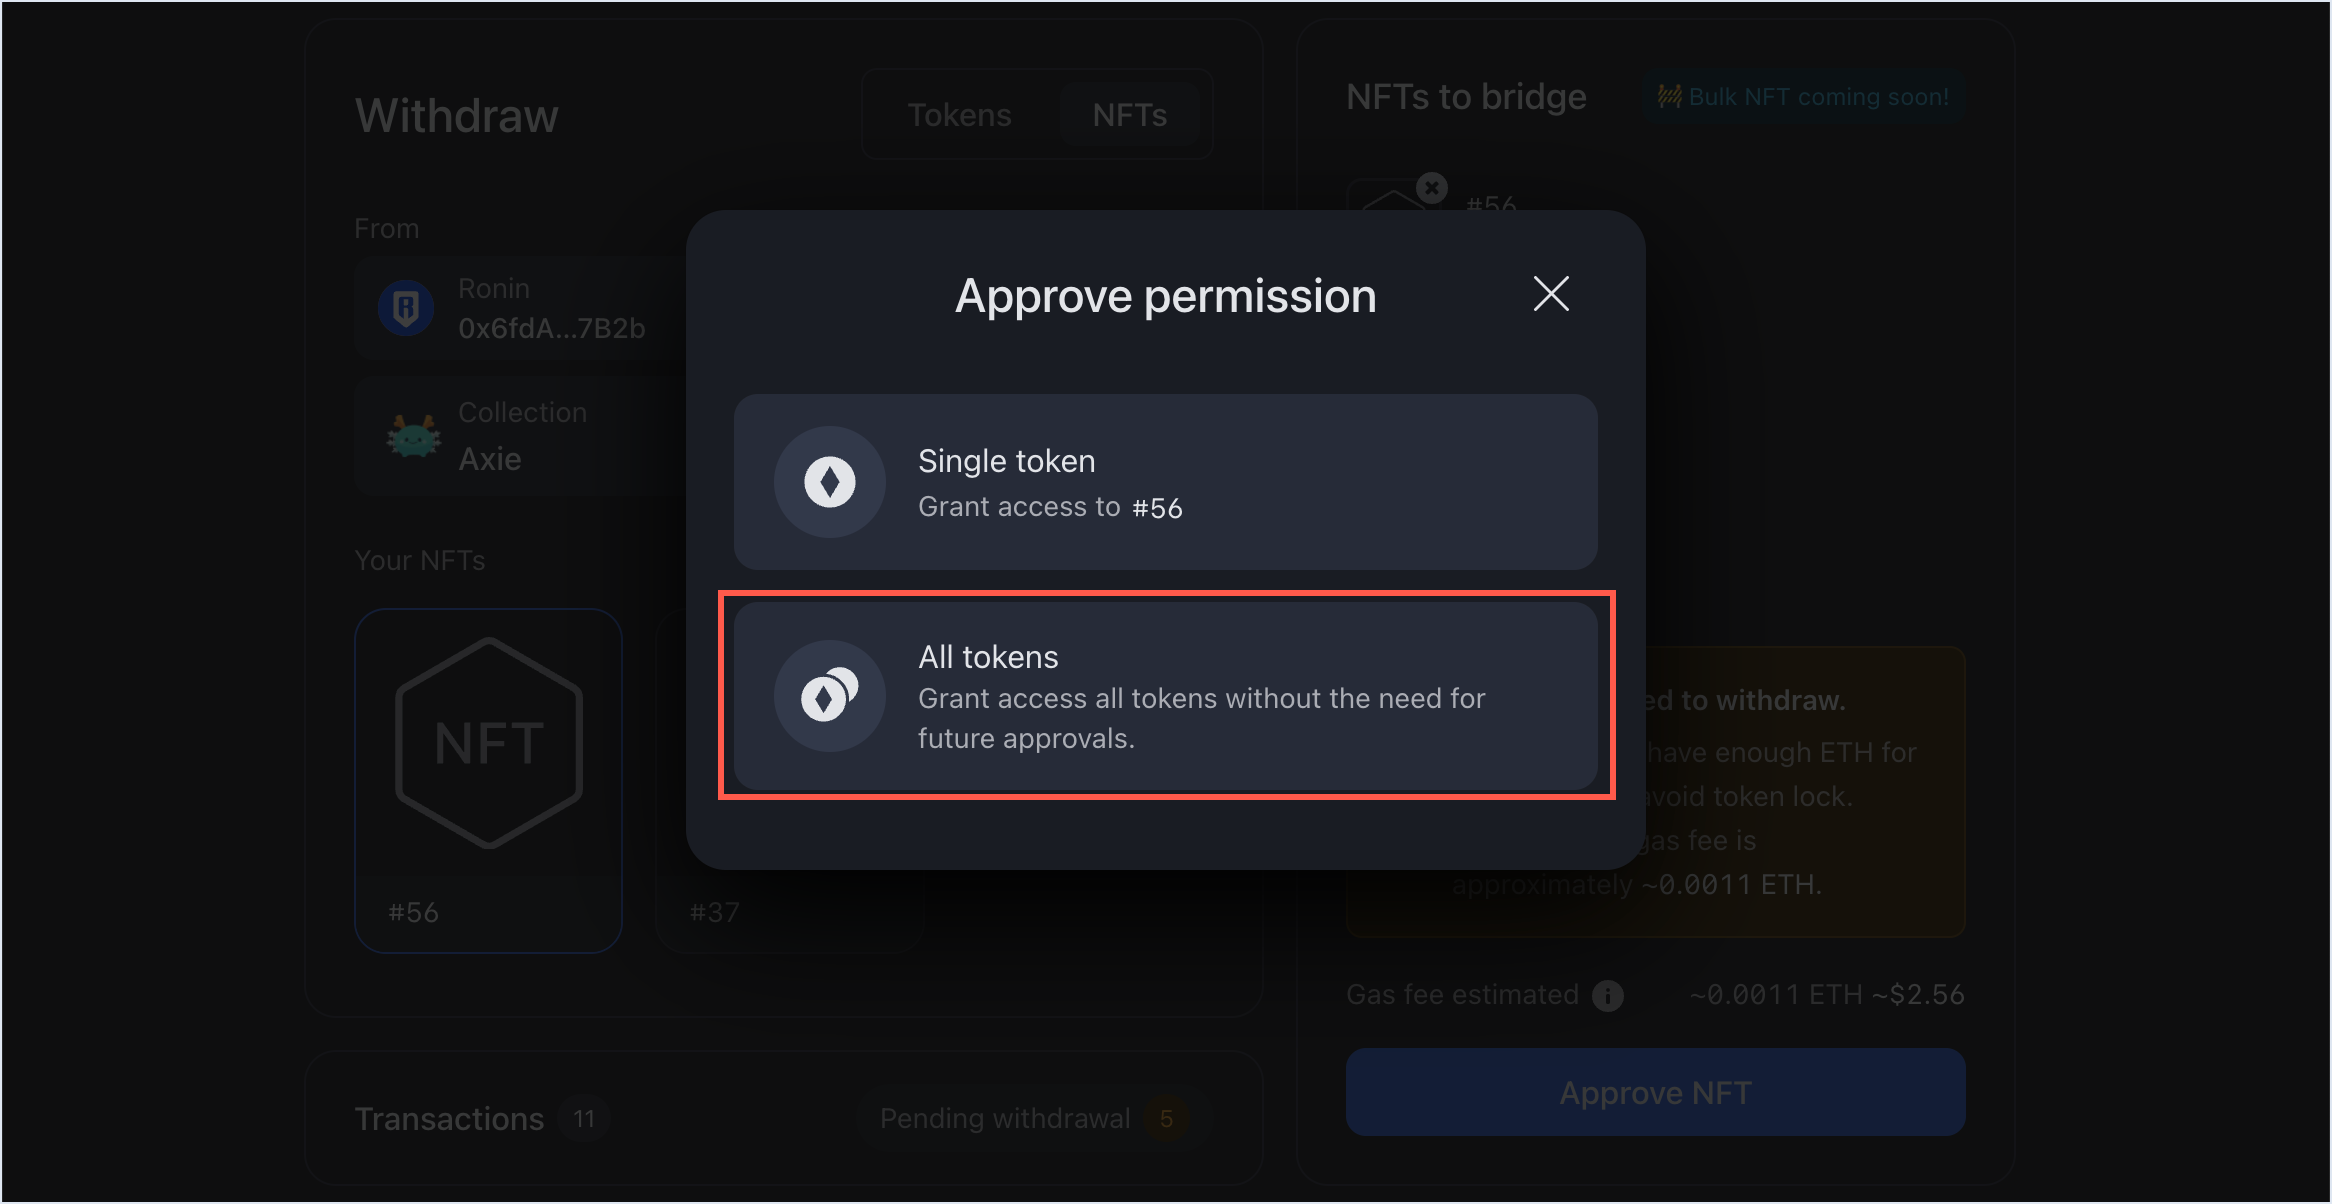
Step 3. Approve the NFT
To withdraw an NFT, you need to grant Ronin Bridge permission to transfer it, which is also referred to as approval. You have two ways to do it: approve a single token or approve all tokens.
Approve a single token
Approving a single token means that every time you transfer an NFT, you will need to approve each token individually. So when you transfer another token in the future, you will need to approve it again.
- With the NFT selected, click Approve NFT.
- Select Single token.
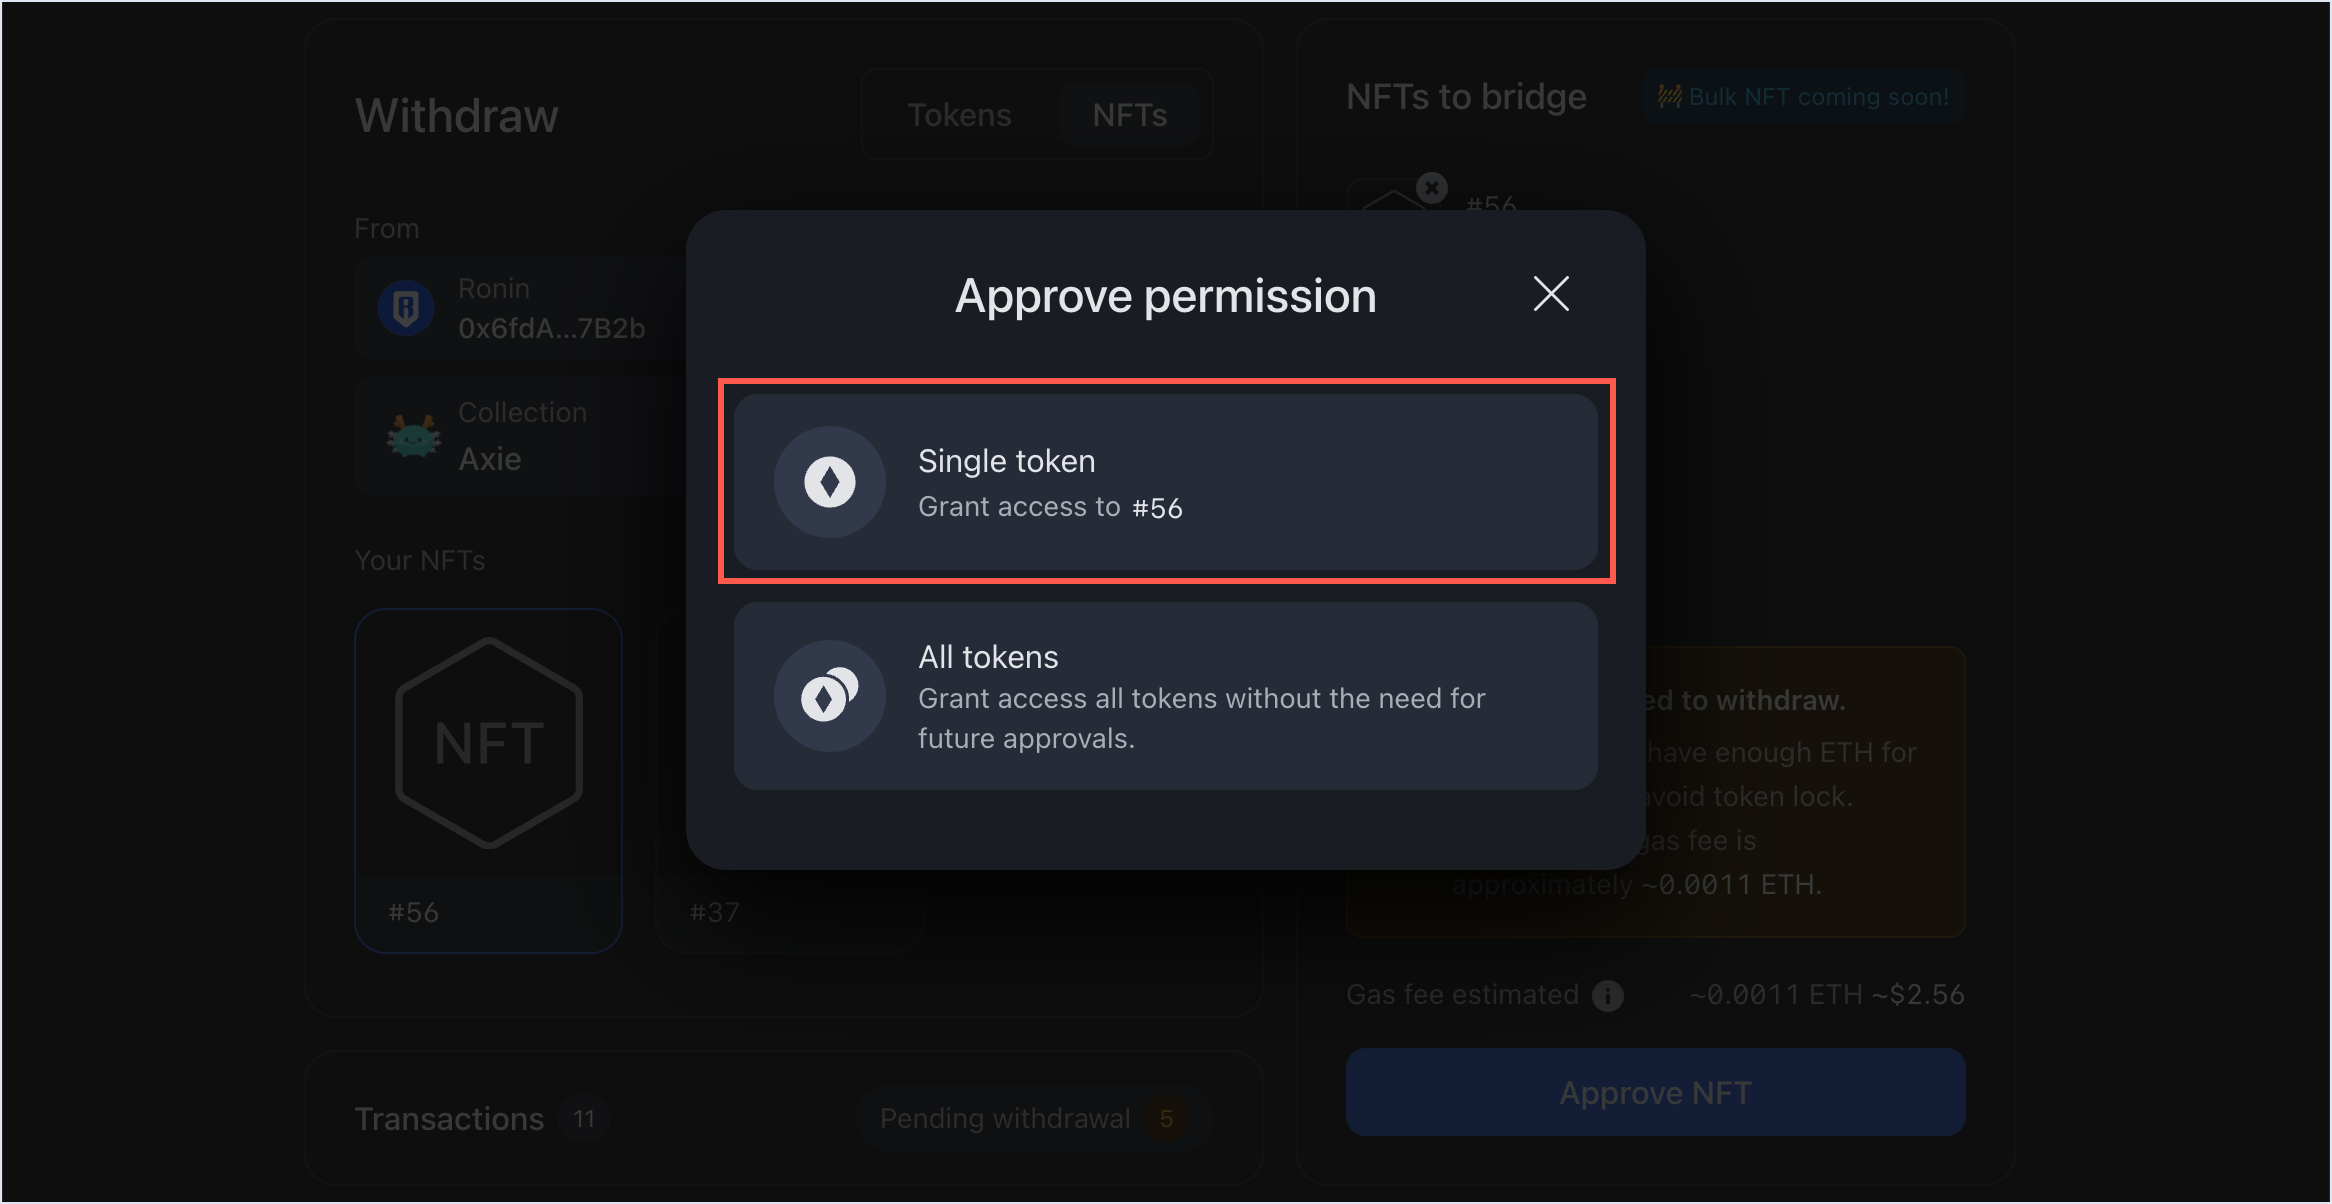
Approve all tokens
Approving all tokens means that you only need to grant approval once, and your future NFT transfers will not require any approval.
- Select the NFT you want to transfer, then click Approve NFT.
- Select All tokens.
You can revoke token approval by using the Token Revoke tool.
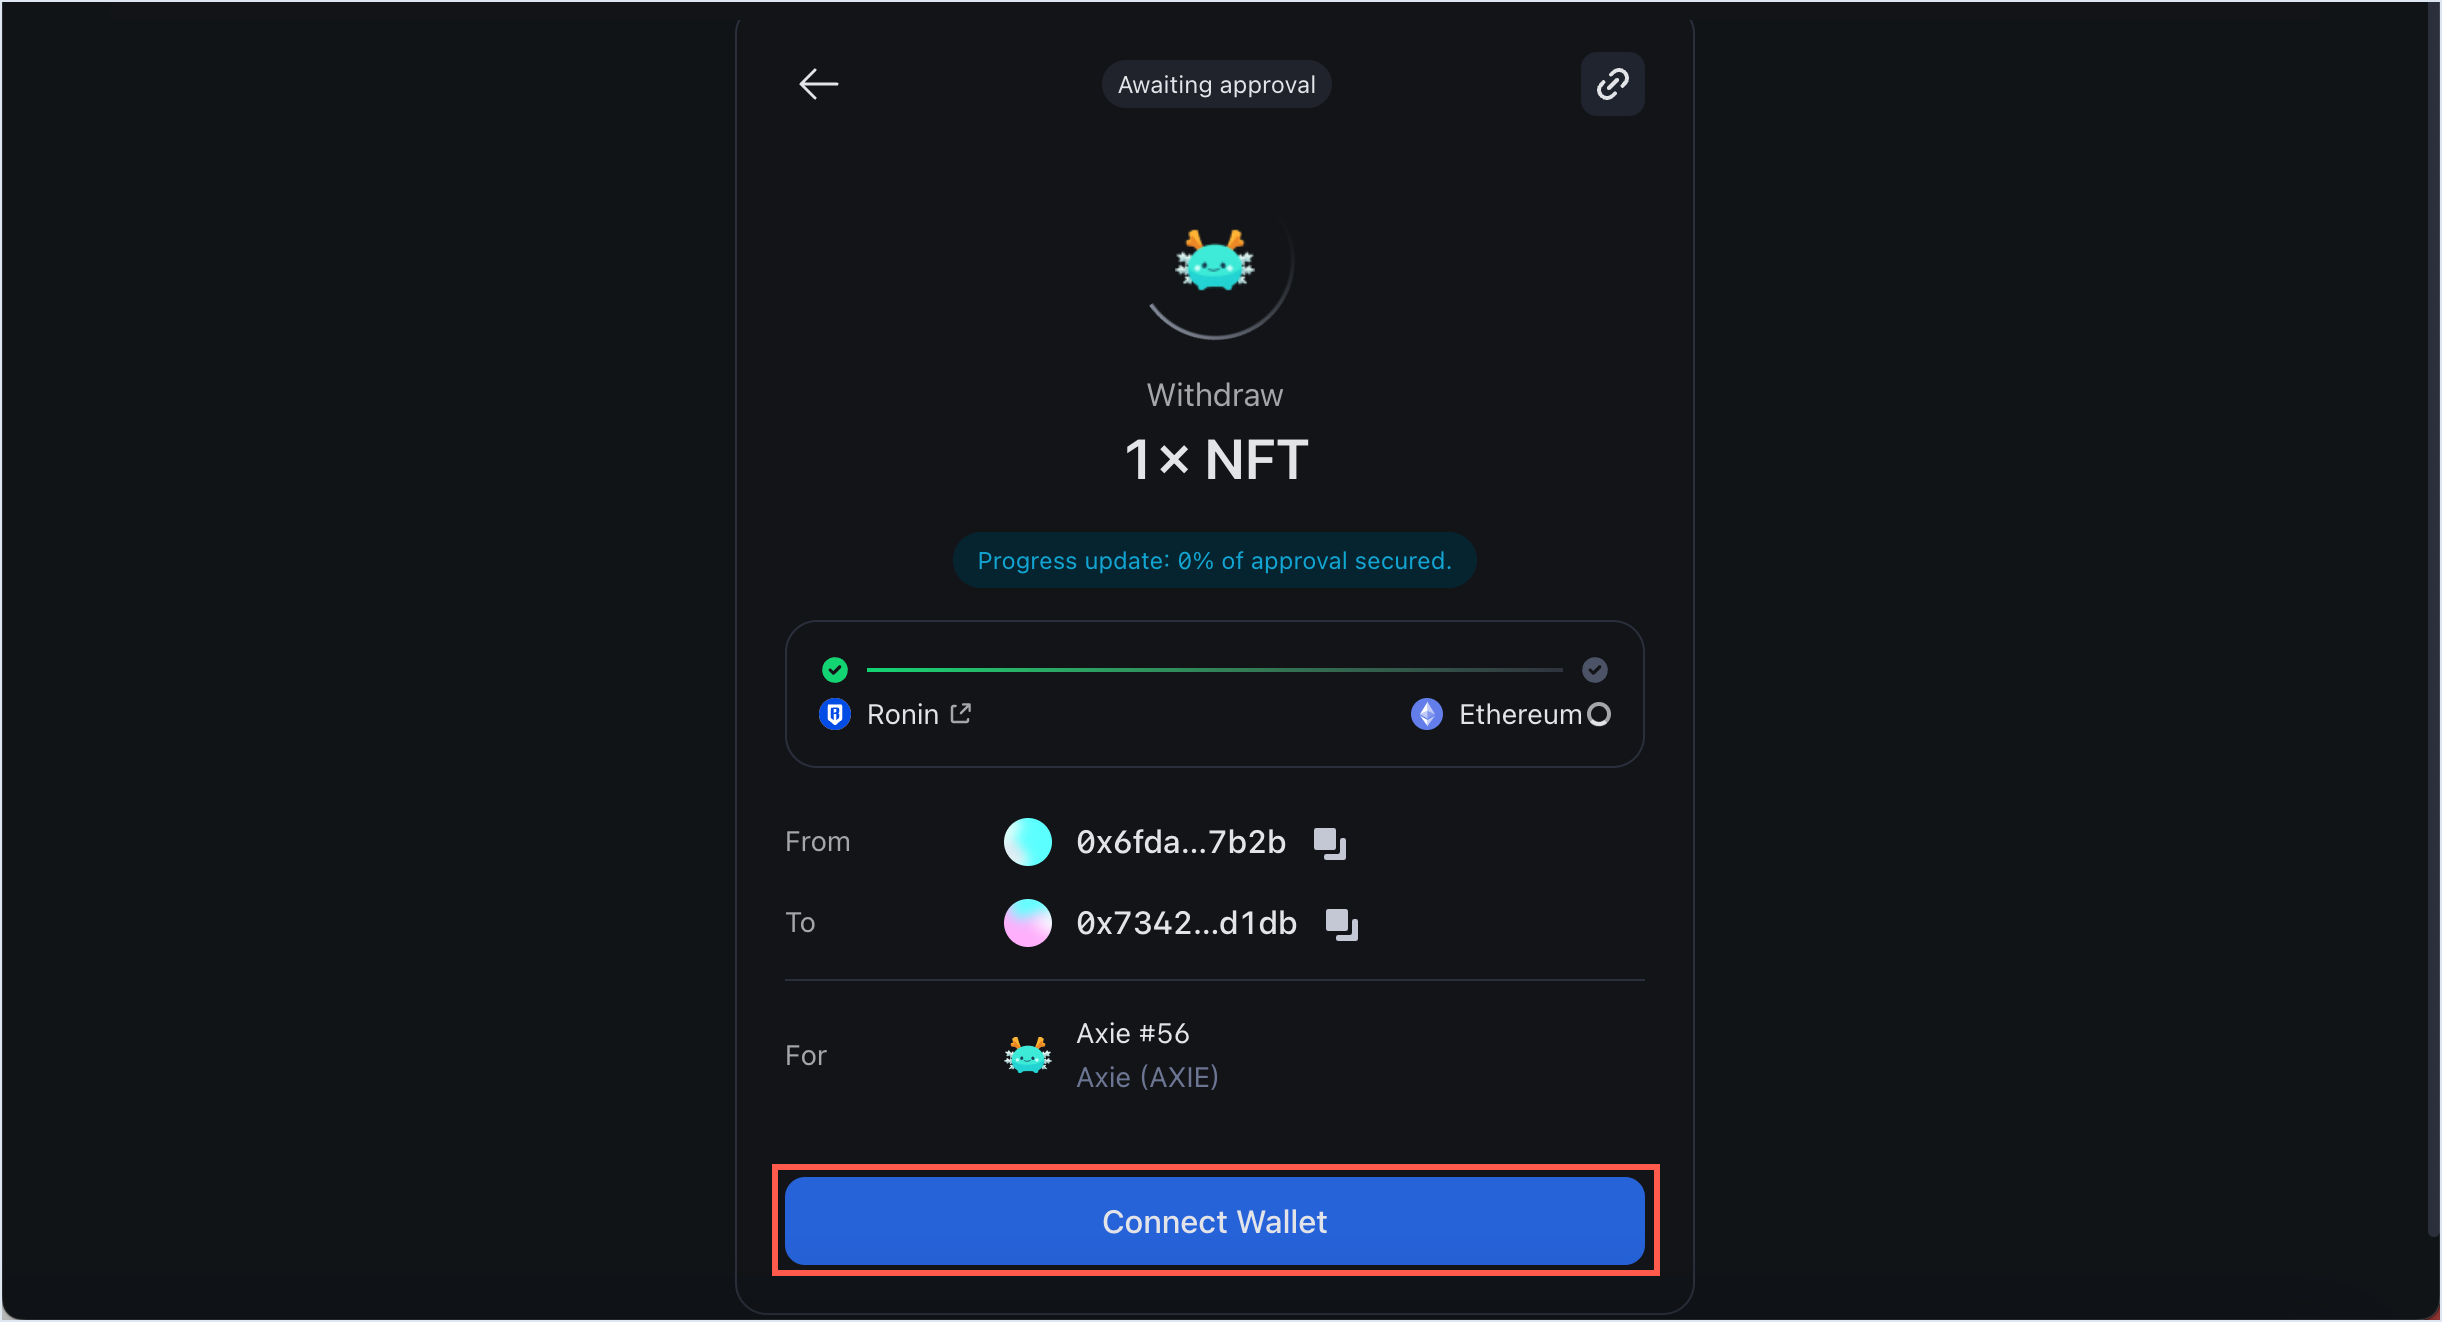
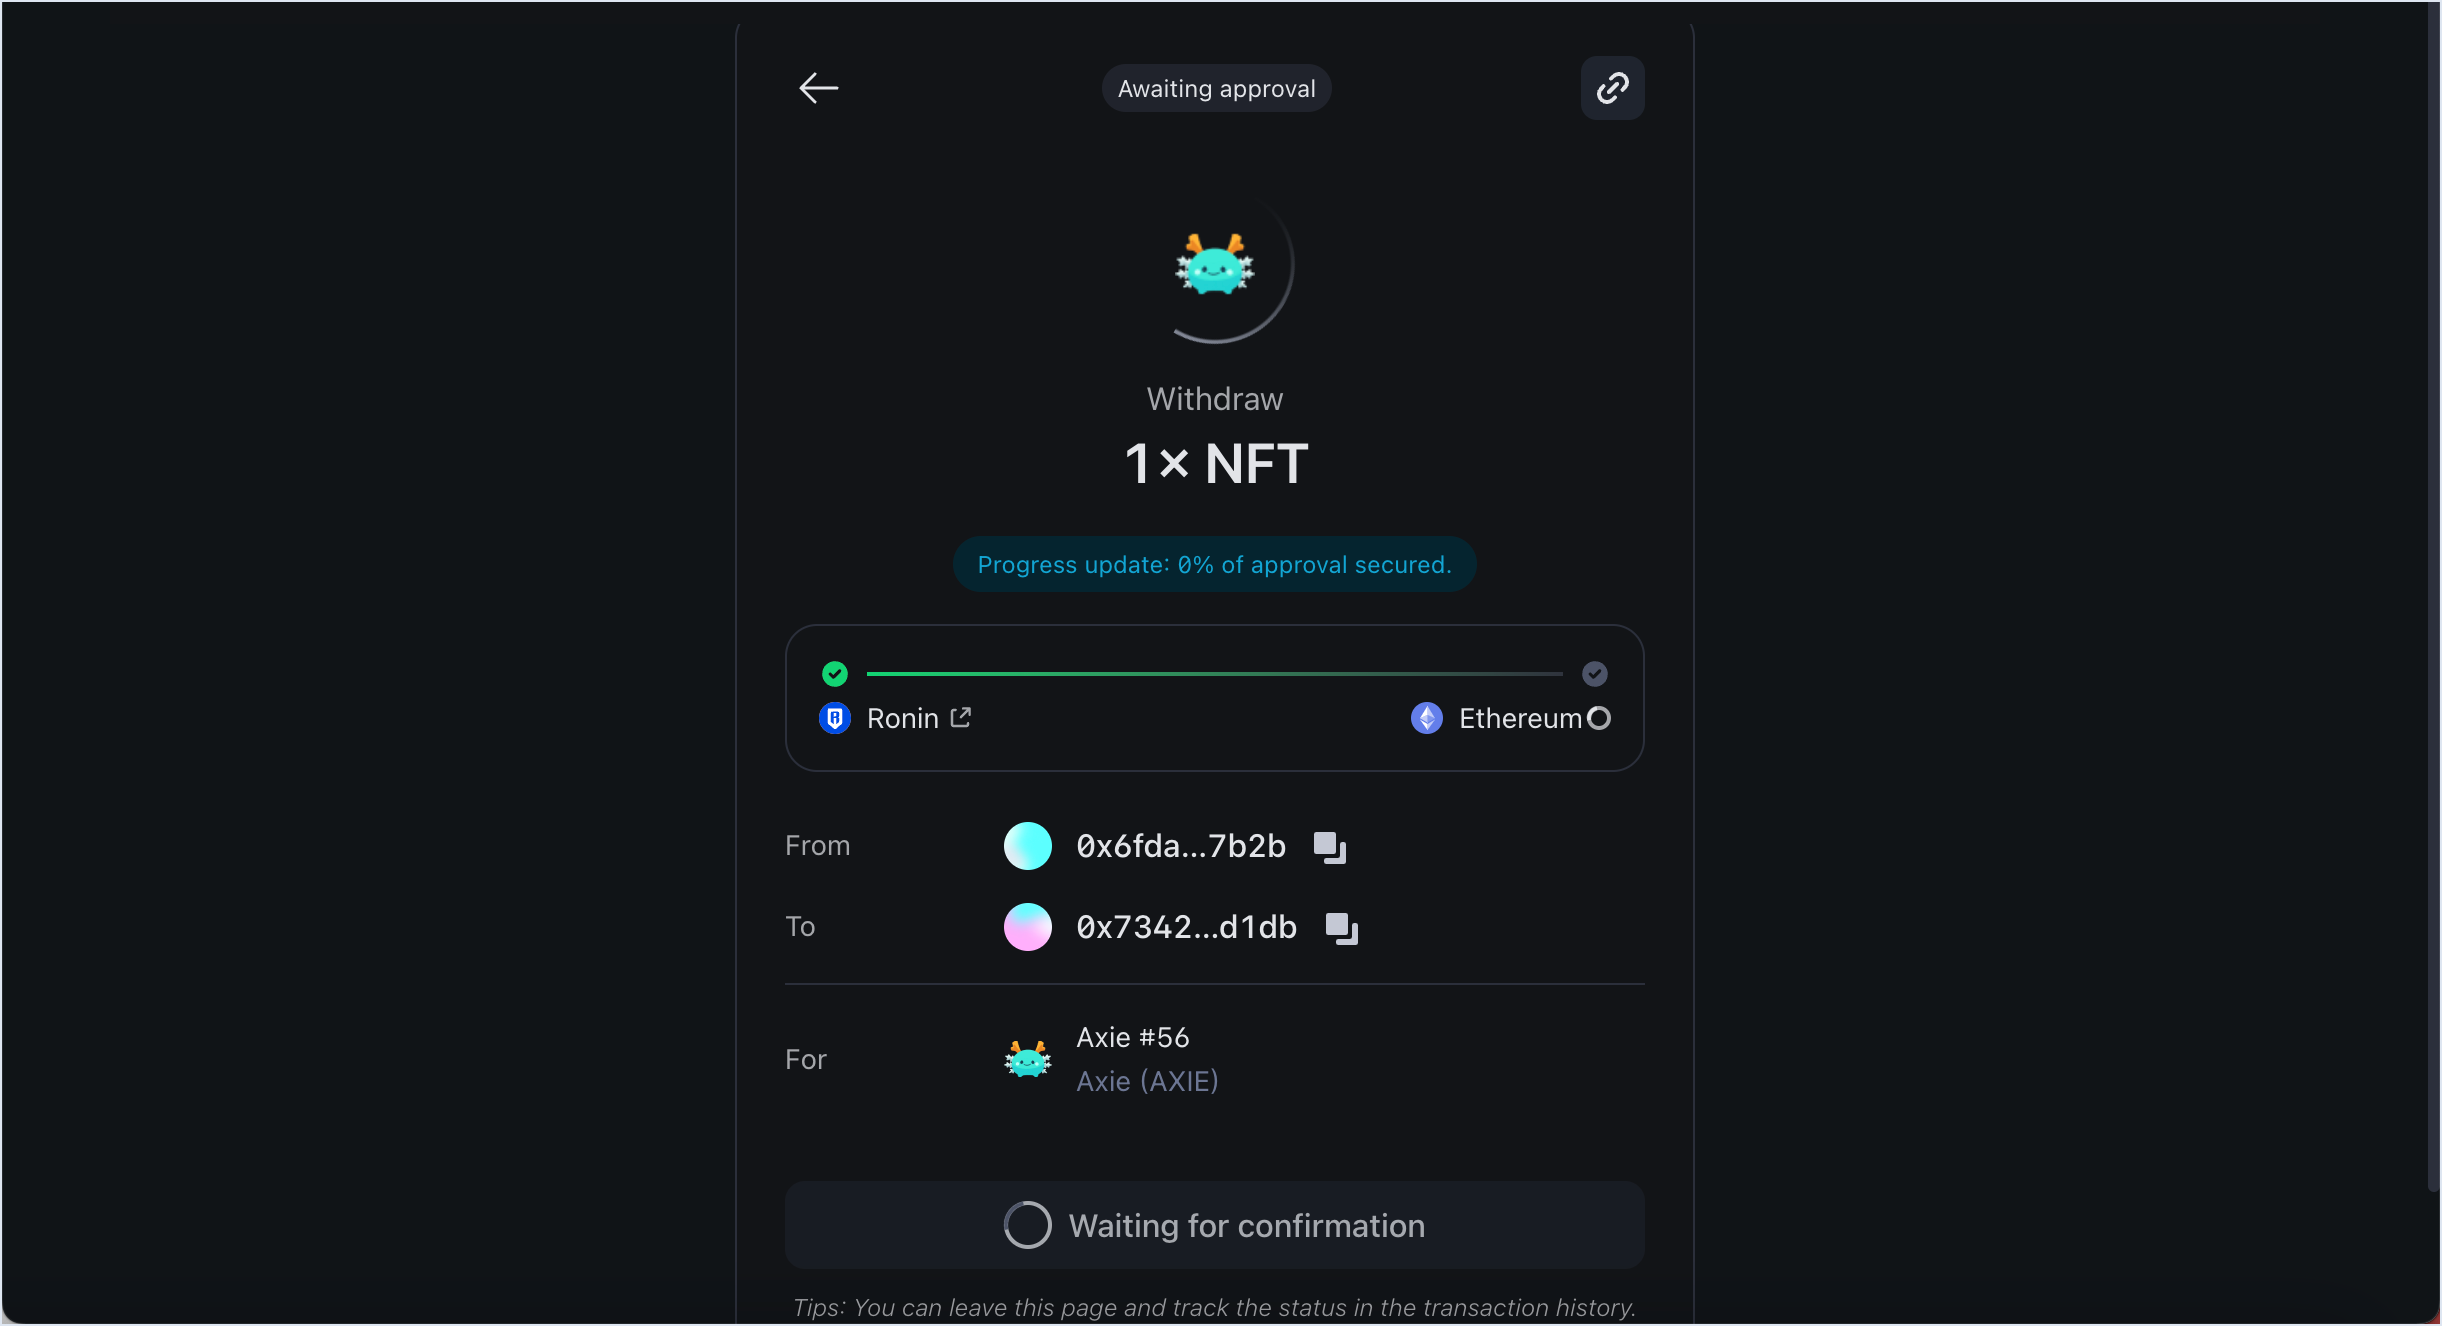
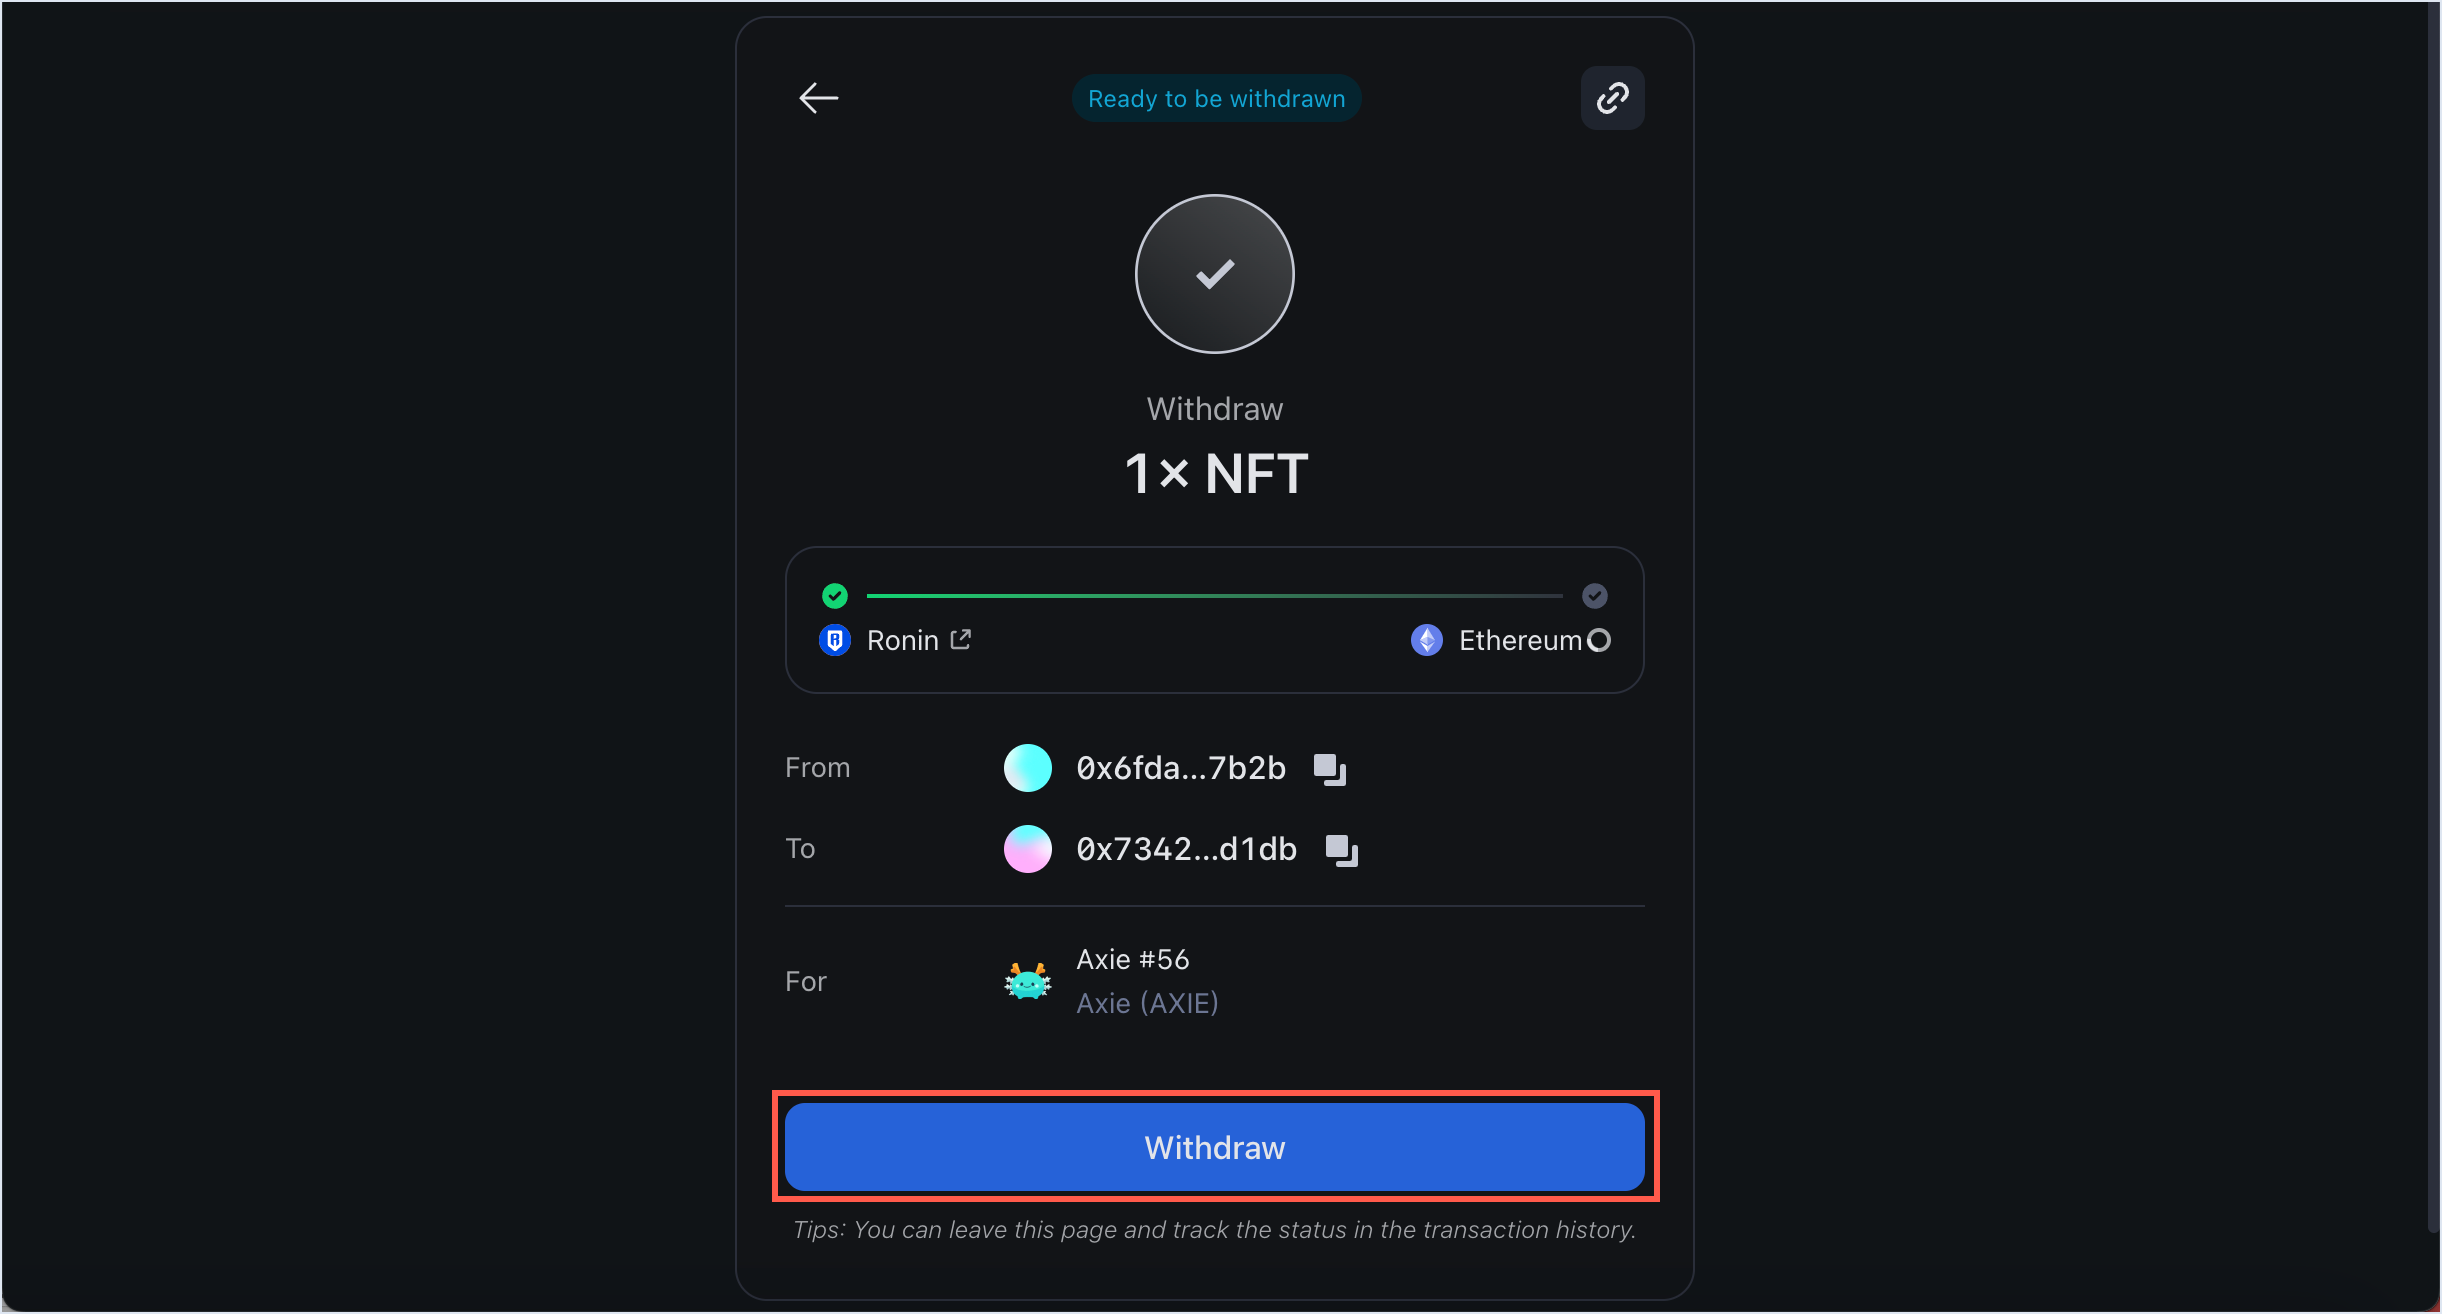
Step 4. Confirm your withdrawal
- Review the transaction details, including the gas fees associated with the withdrawal. Make sure you have enough ETH in your Ethereum wallet to cover the fees. If everything looks correct, select Submit withdrawal.
- When prompted, sign the transaction in your Ronin Wallet.
- Select Connect Wallet and connect your Ethereum wallet.
- Wait for the transaction to be confirmed by the network. Be patient, however, as transactions can take some time to complete, depending on network congestion and gas fees.
- When the NFT is ready to be withdrawn, select Withdraw to transfer it to your Ethereum address.
- When prompted, sign the transaction in your connected Ethereum wallet to receive the transfer.
Step 5. Receive the NFT in your Ethereum wallet
When the withdrawal is complete, you'll see a "Withdrawal completed" window.
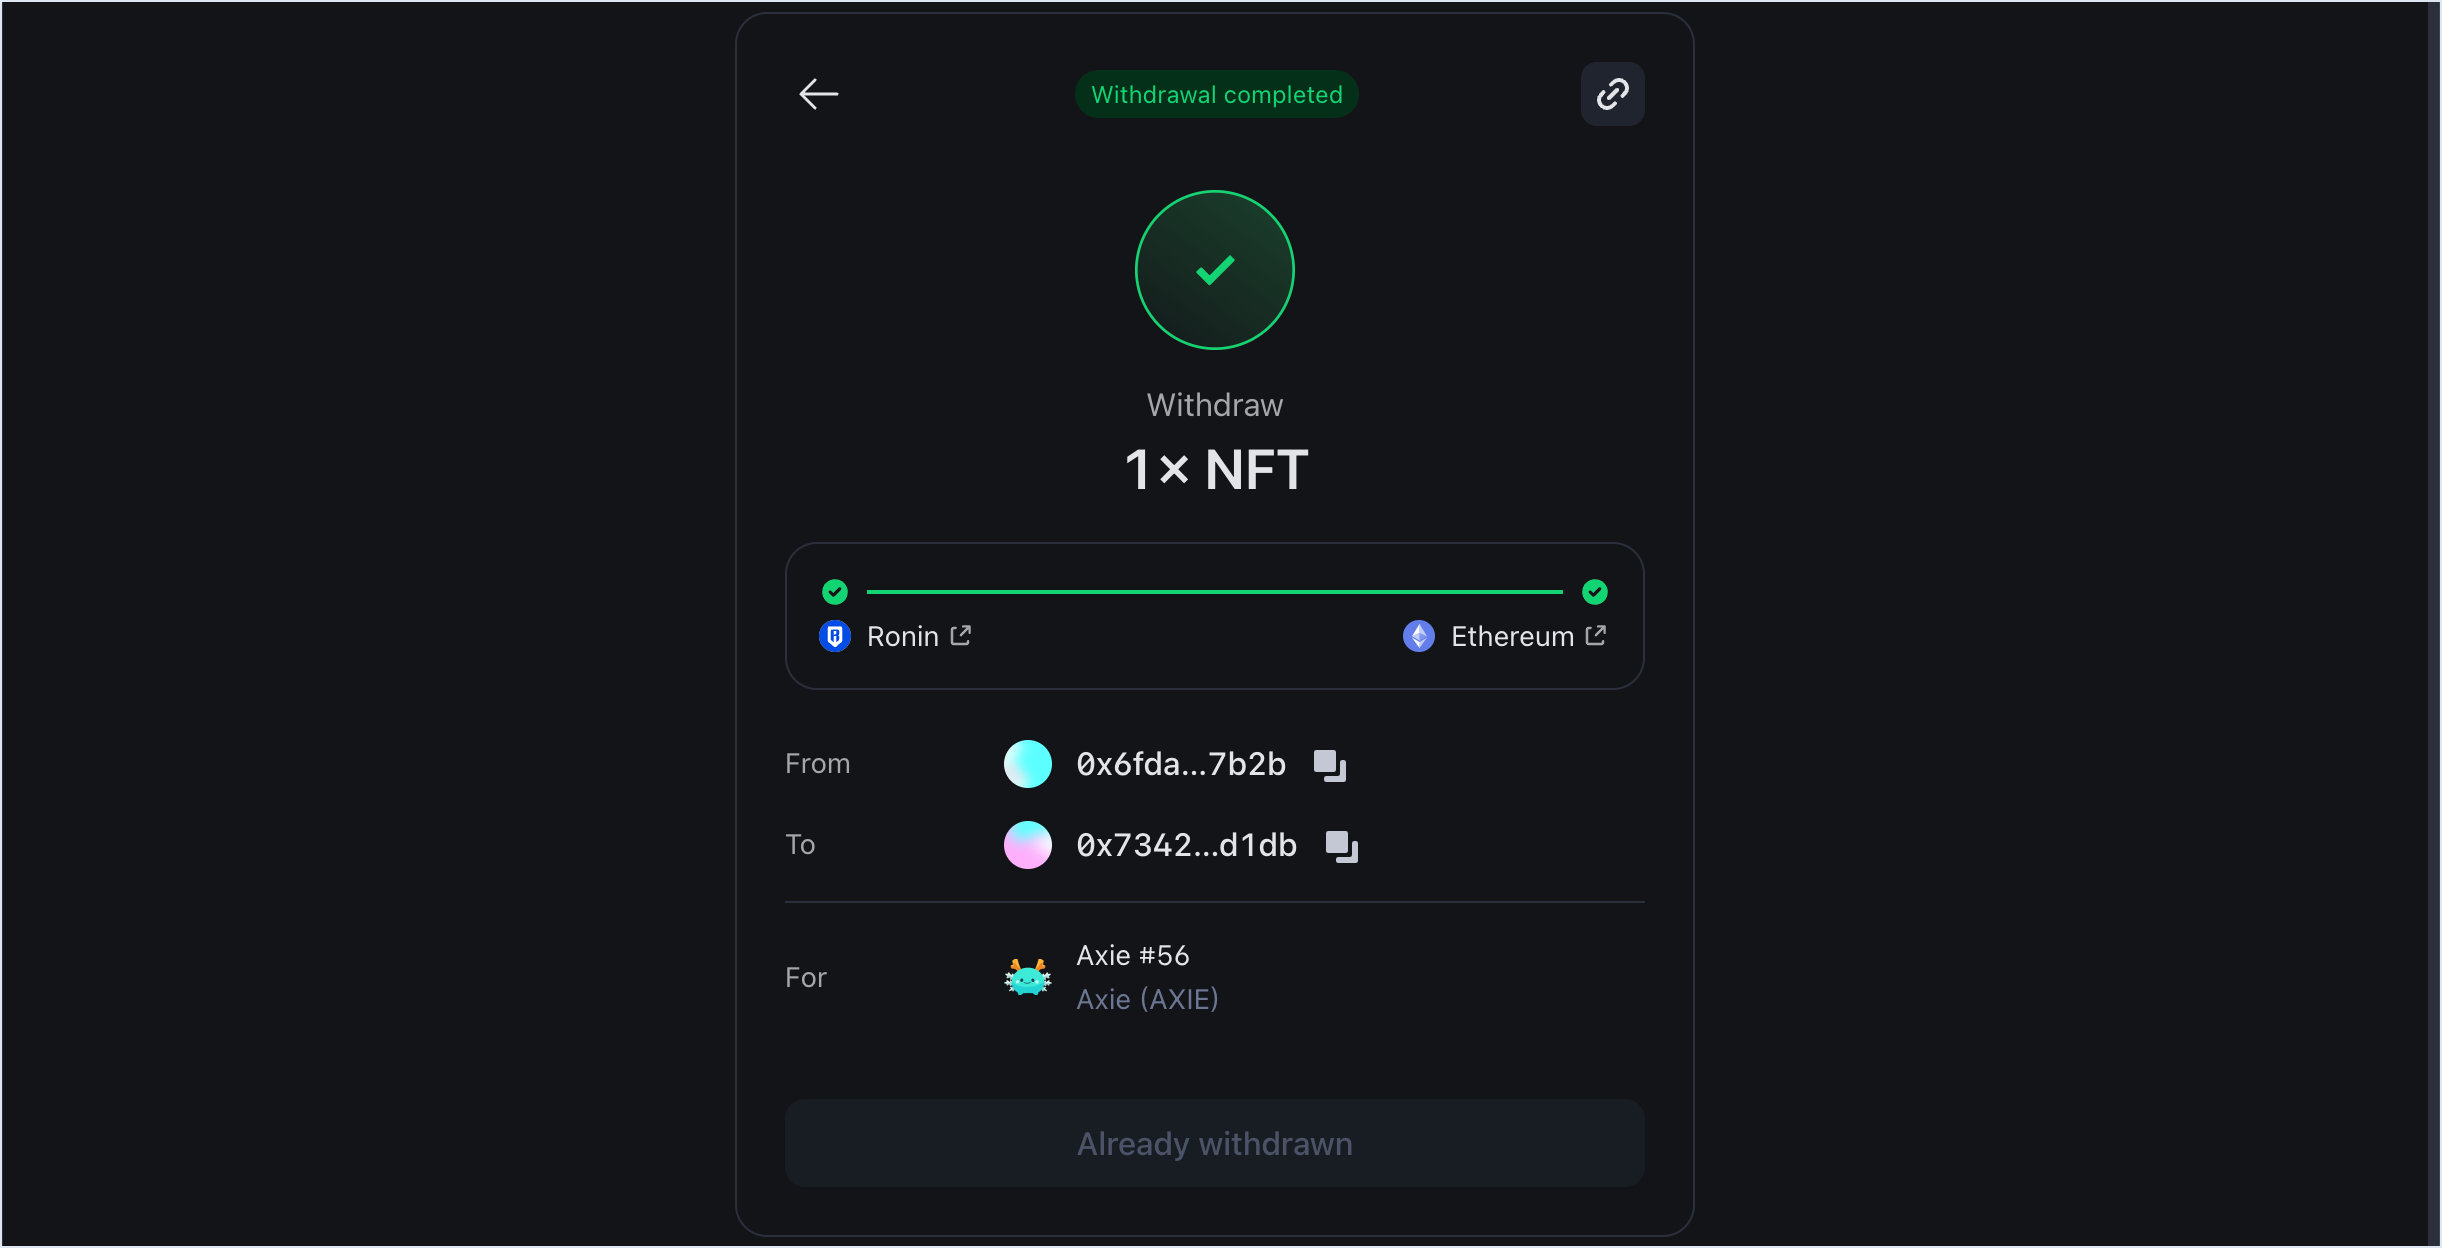 You can now check your connected wallet to verify that the NFT has arrived successfully.