Withdraw an ERC20 token
Overview
This guide describes how to use Ronin Bridge to send an ERC20 token from your Ronin Wallet to an address on Ethereum.
Prerequisites
If you access Ronin Bridge through the Ronin Wallet mobile app, then you can only connect Ethereum wallets imported into your Ronin Wallet beforehand.
To import your Ethereum wallets, see Importing Your MetaMask Wallet to Ronin Wallet.
Step 1. Add the sender and recipient addresses
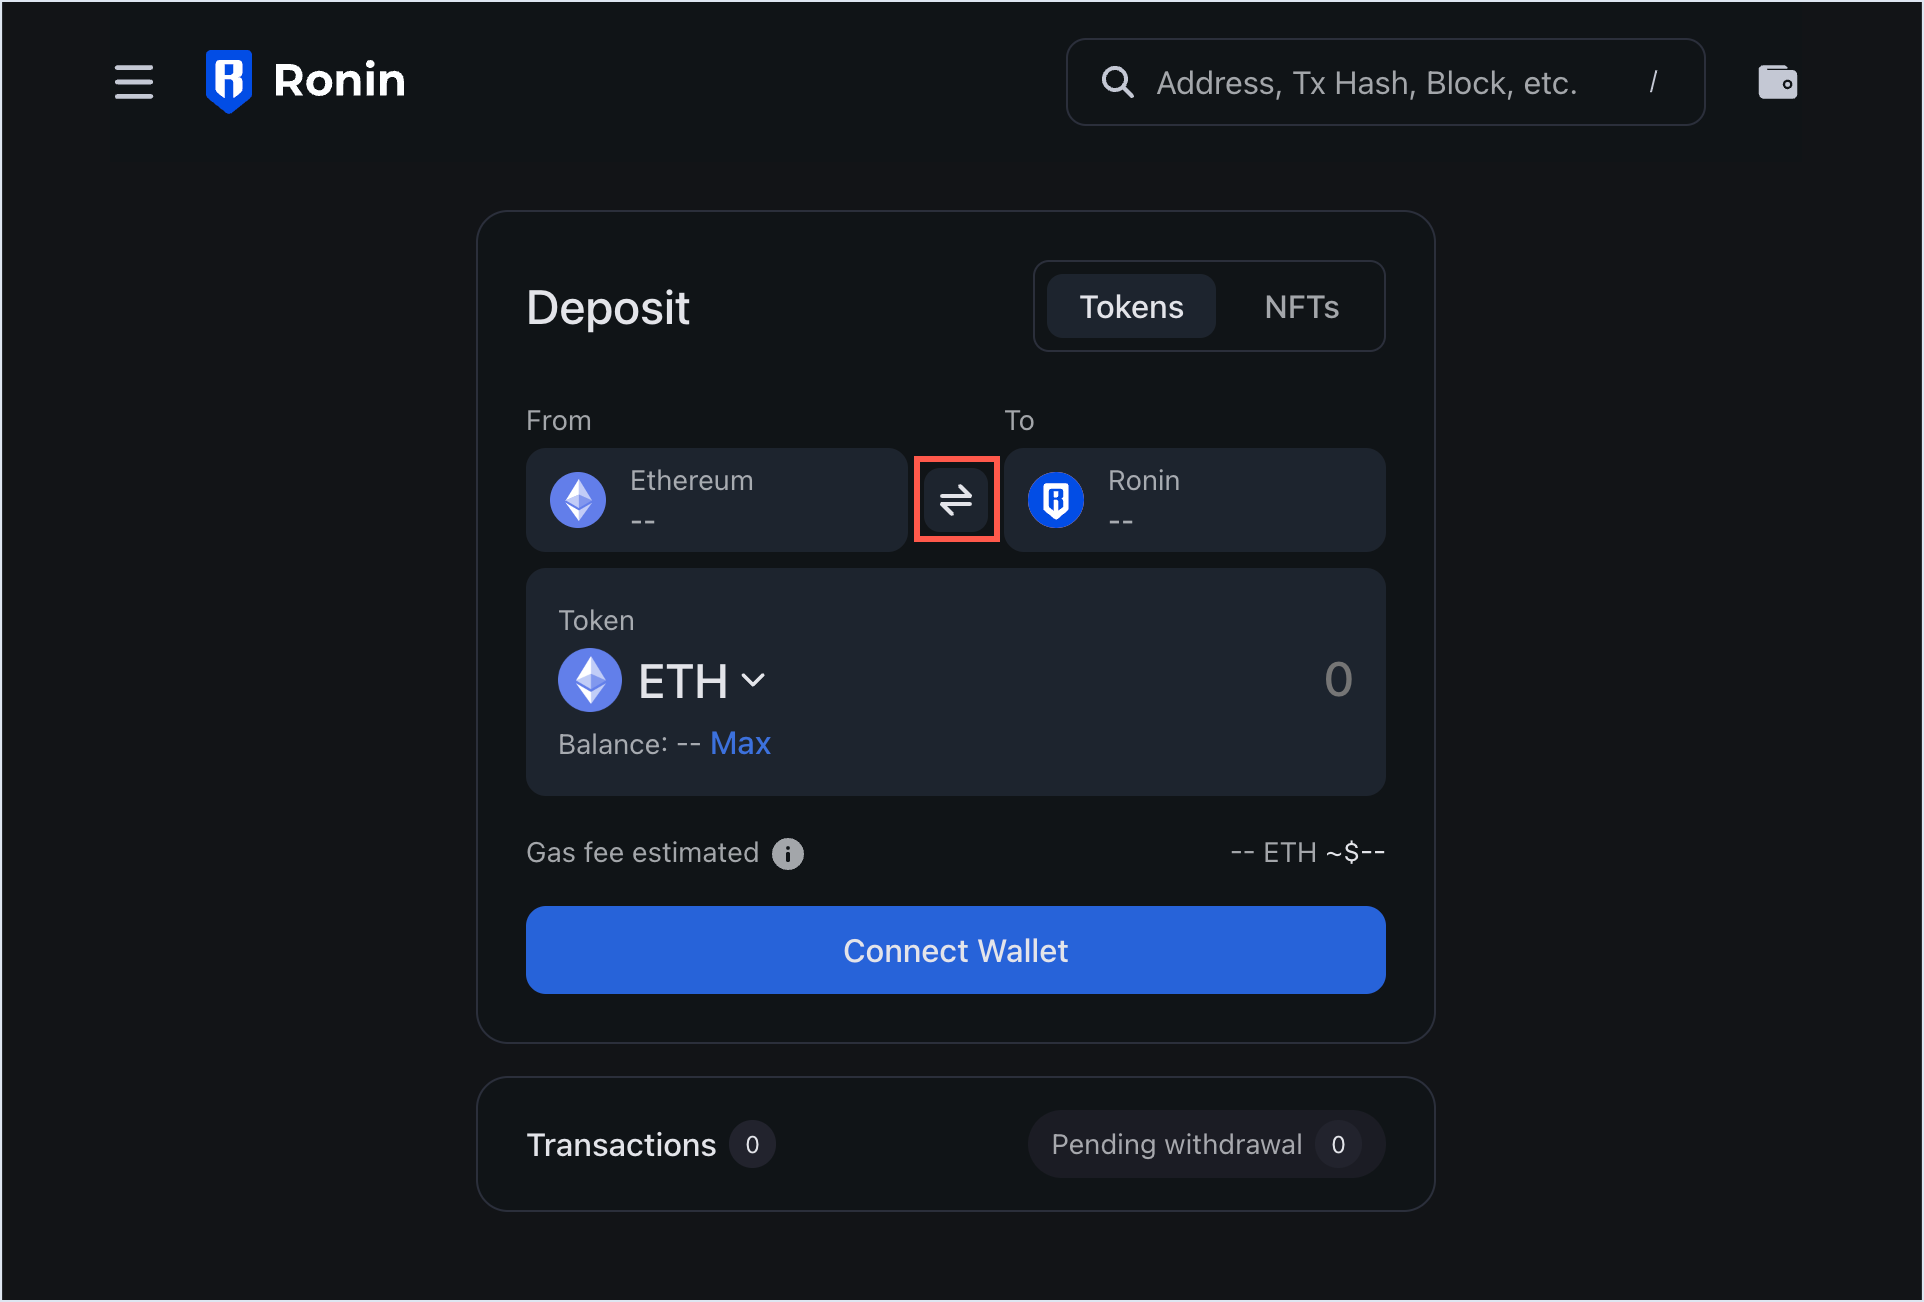
- Open Ronin Bridge.
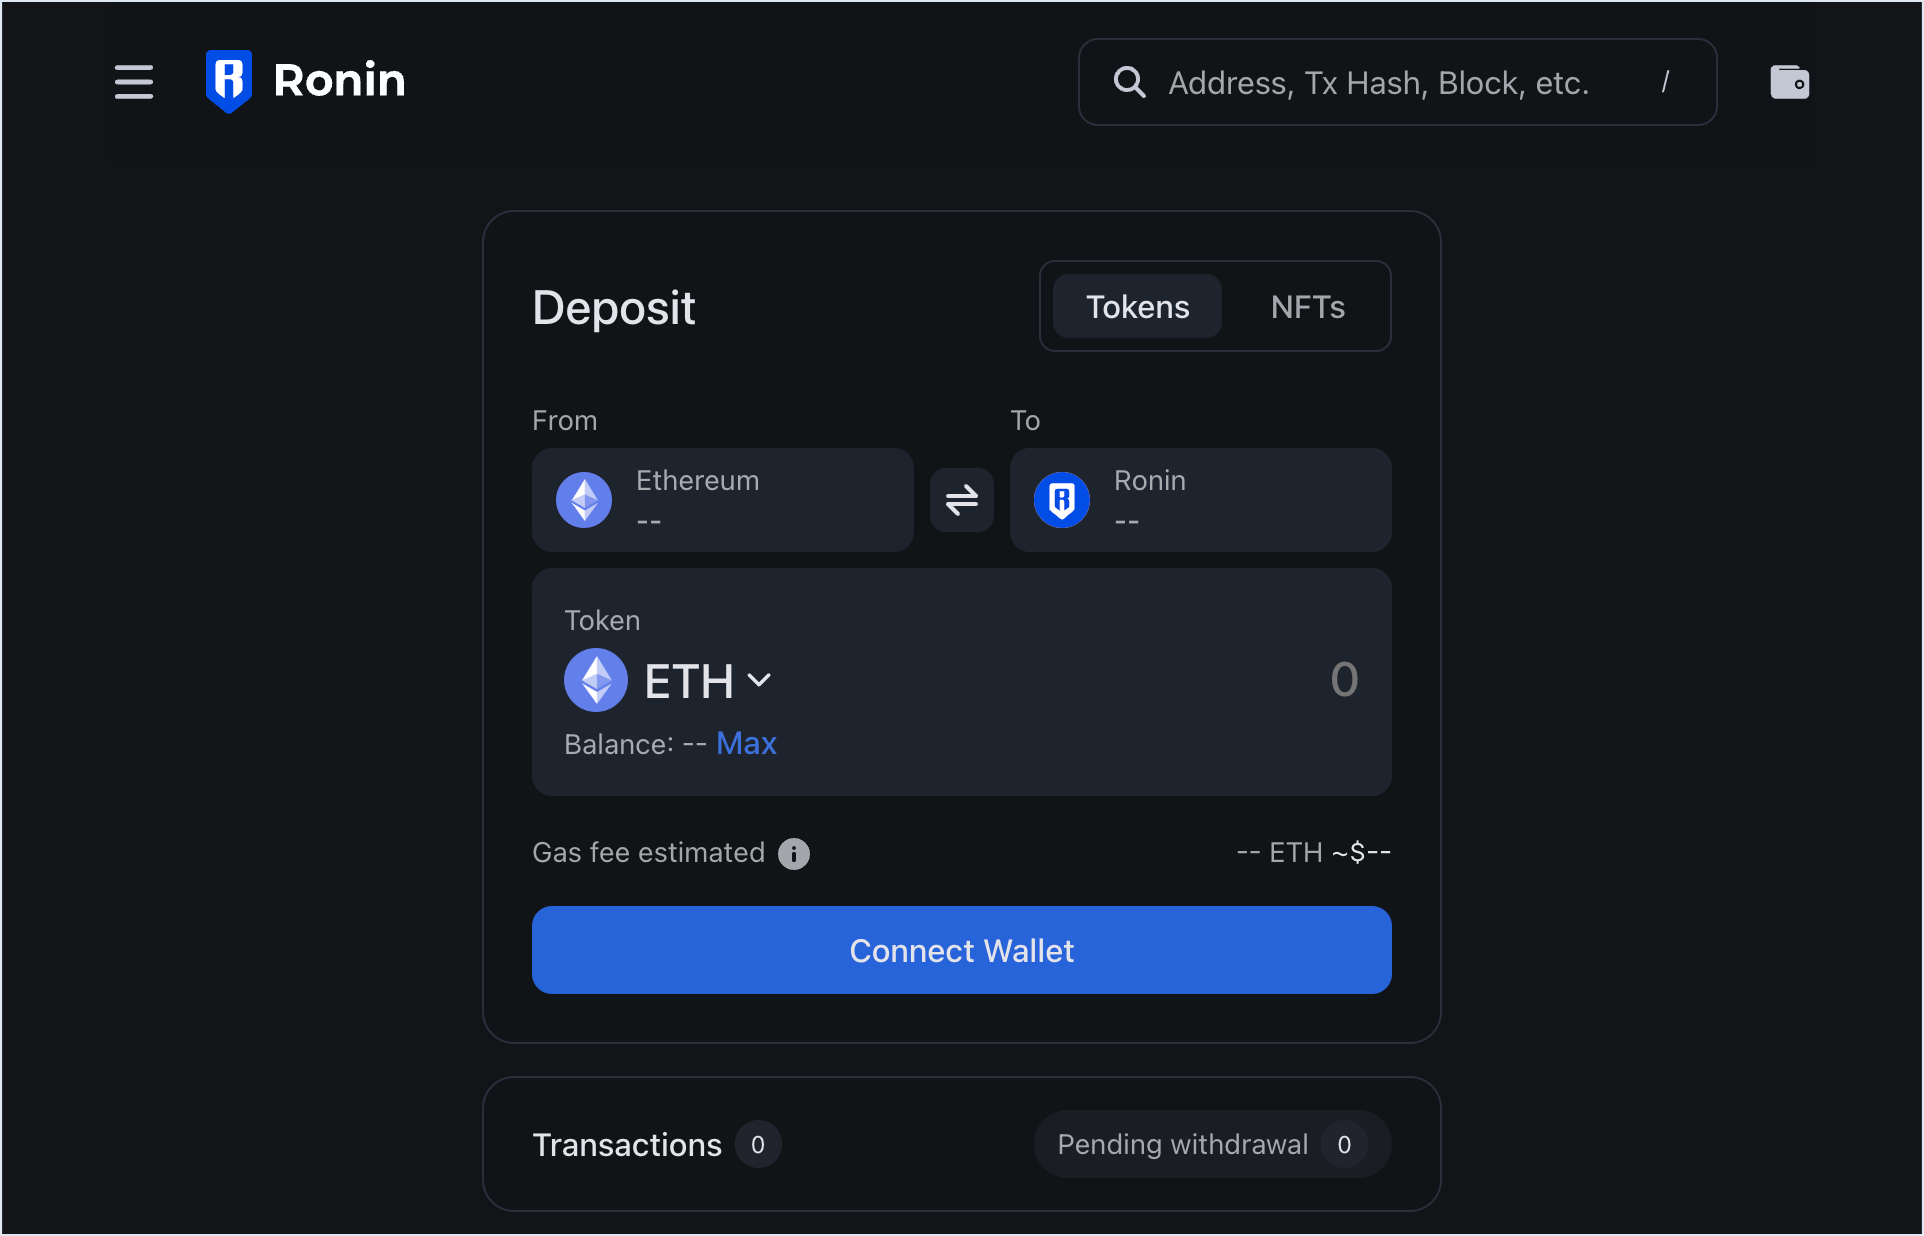
- Switch to the withdrawal feature by selecting the button between the From and To fields.
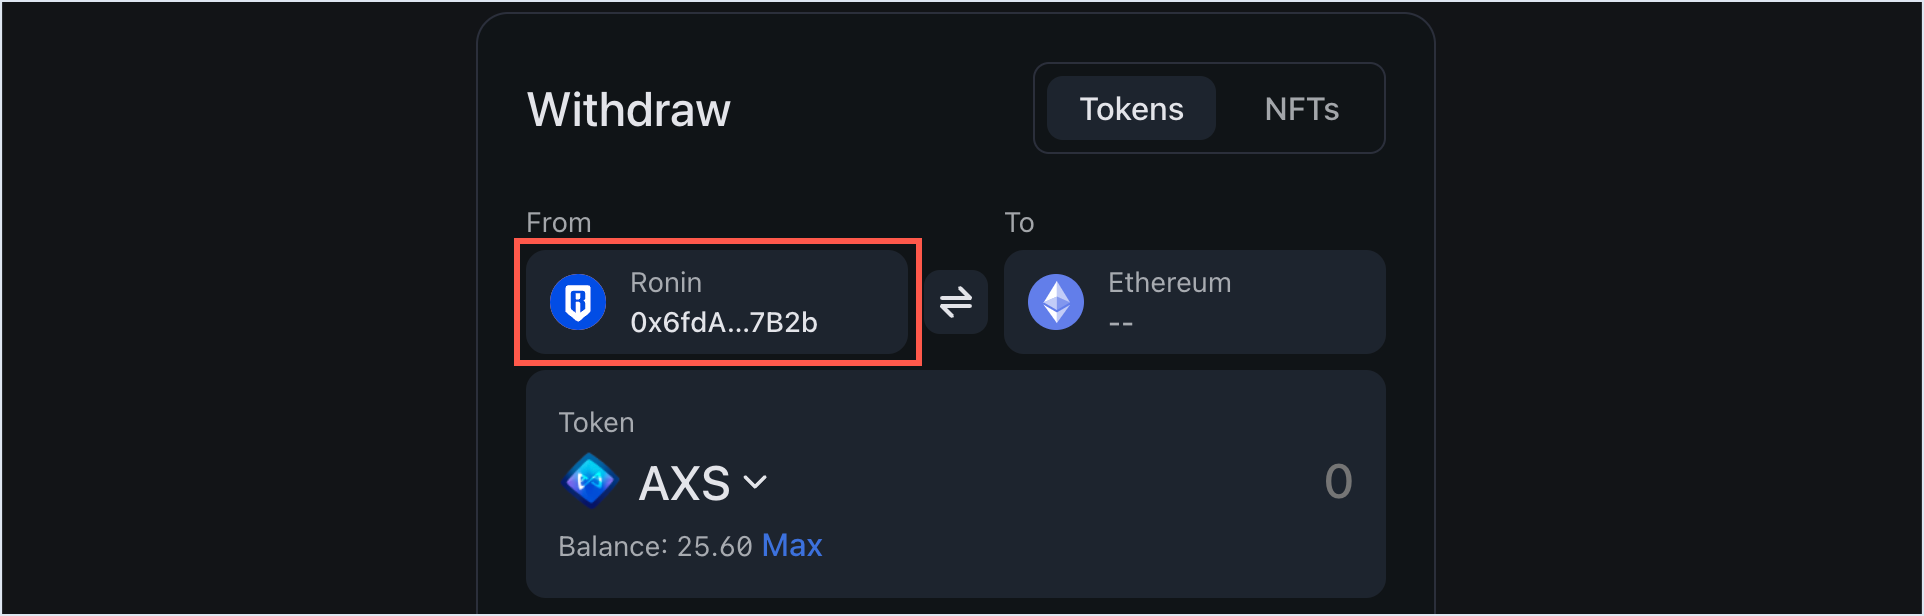
- In the From field, connect your Ronin Wallet using the browser extension or mobile app for your device.
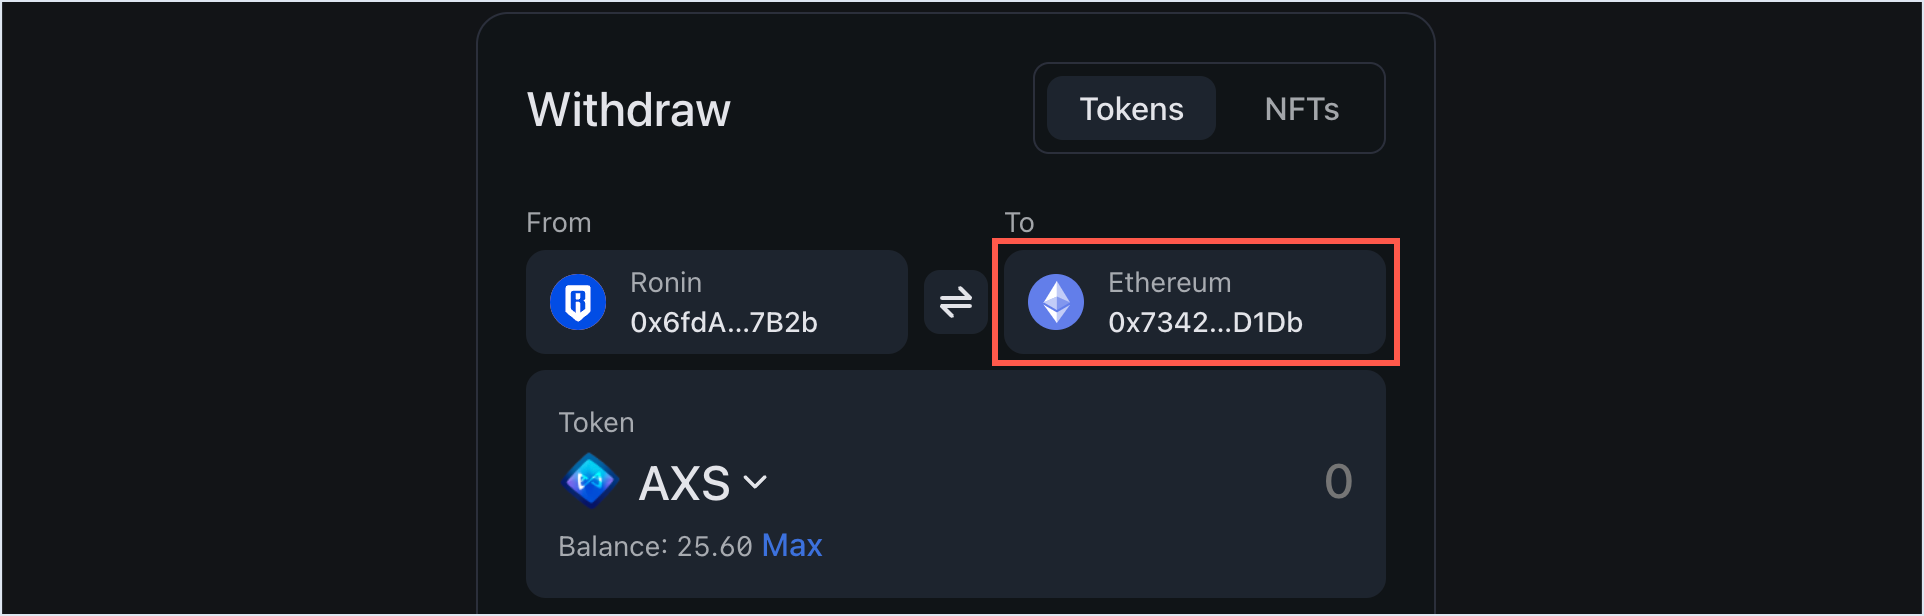
- In the To field, enter the Ethereum address that you want to transfer the token to. Double-check the recipient address to avoid sending your tokens to the wrong destination.
Ronin Wallet app
If you access Ronin Bridge through the Ronin Wallet mobile app, then you can enter any Ethereum address as a recipient, but only your imported Ethereum wallet can pay the gas fees for the transaction.
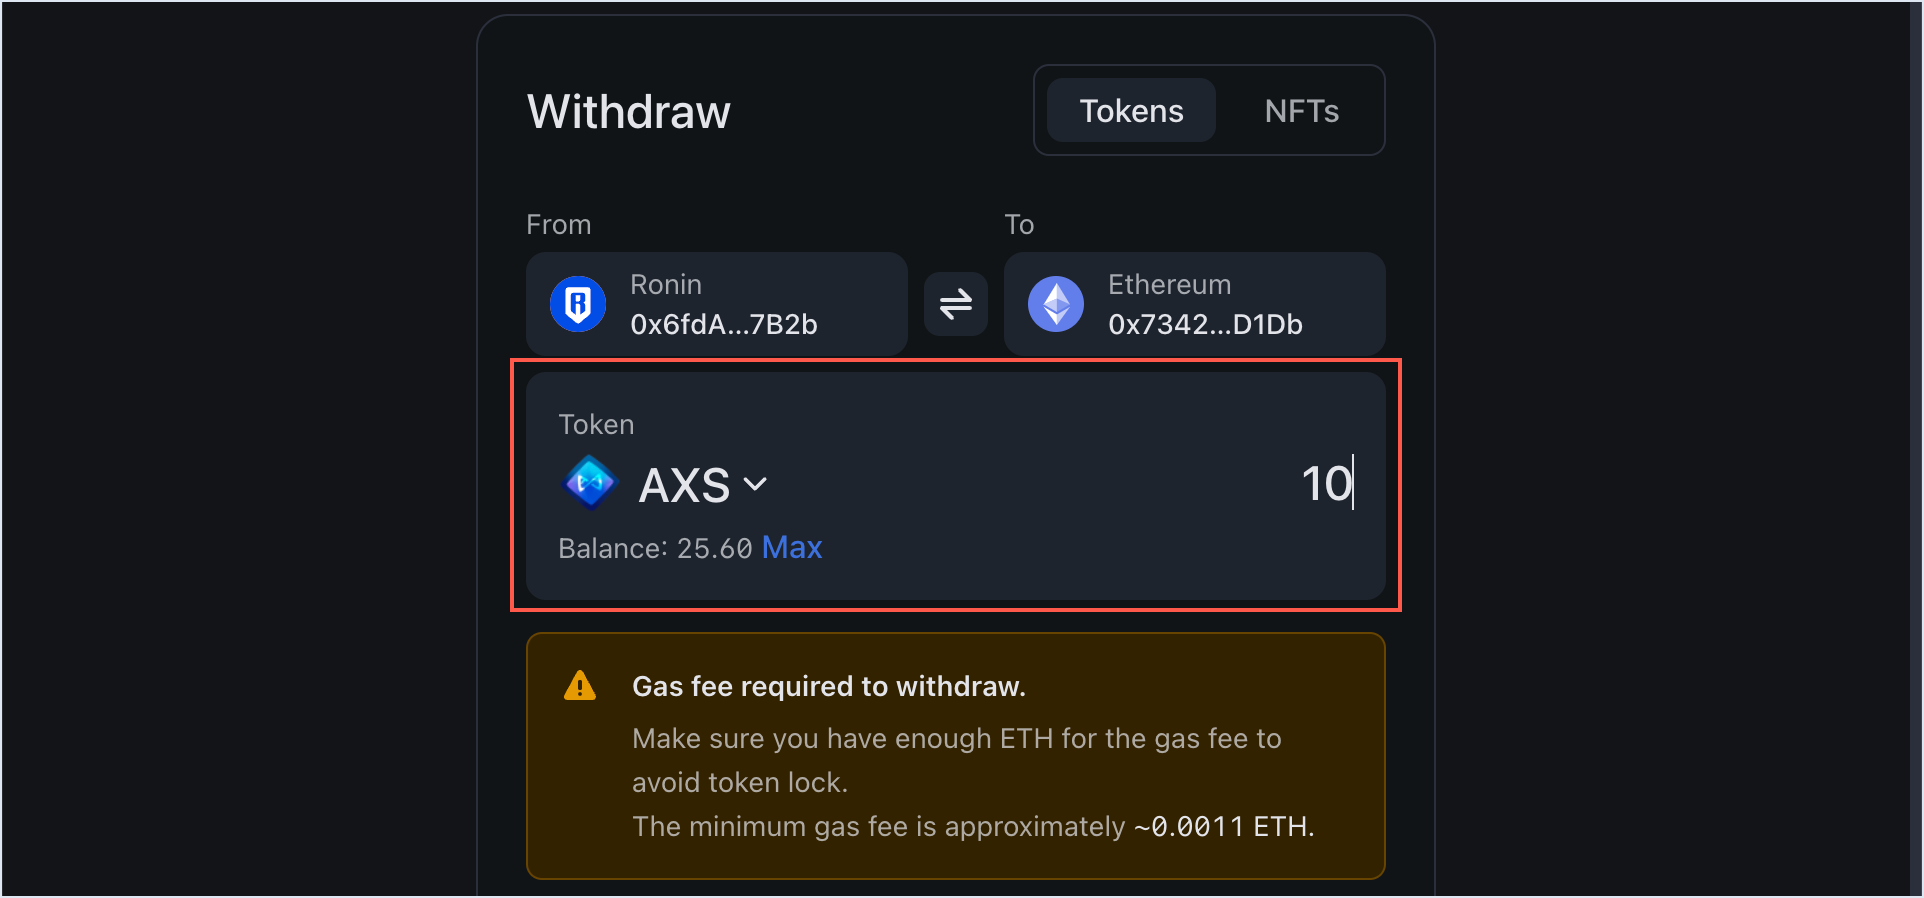
Step 2. Choose the token and amount
- Choose the ERC20 token that you want to withdraw, then enter the withdrawal amount manually or select Max to withdraw the entire balance of this token available in your wallet.
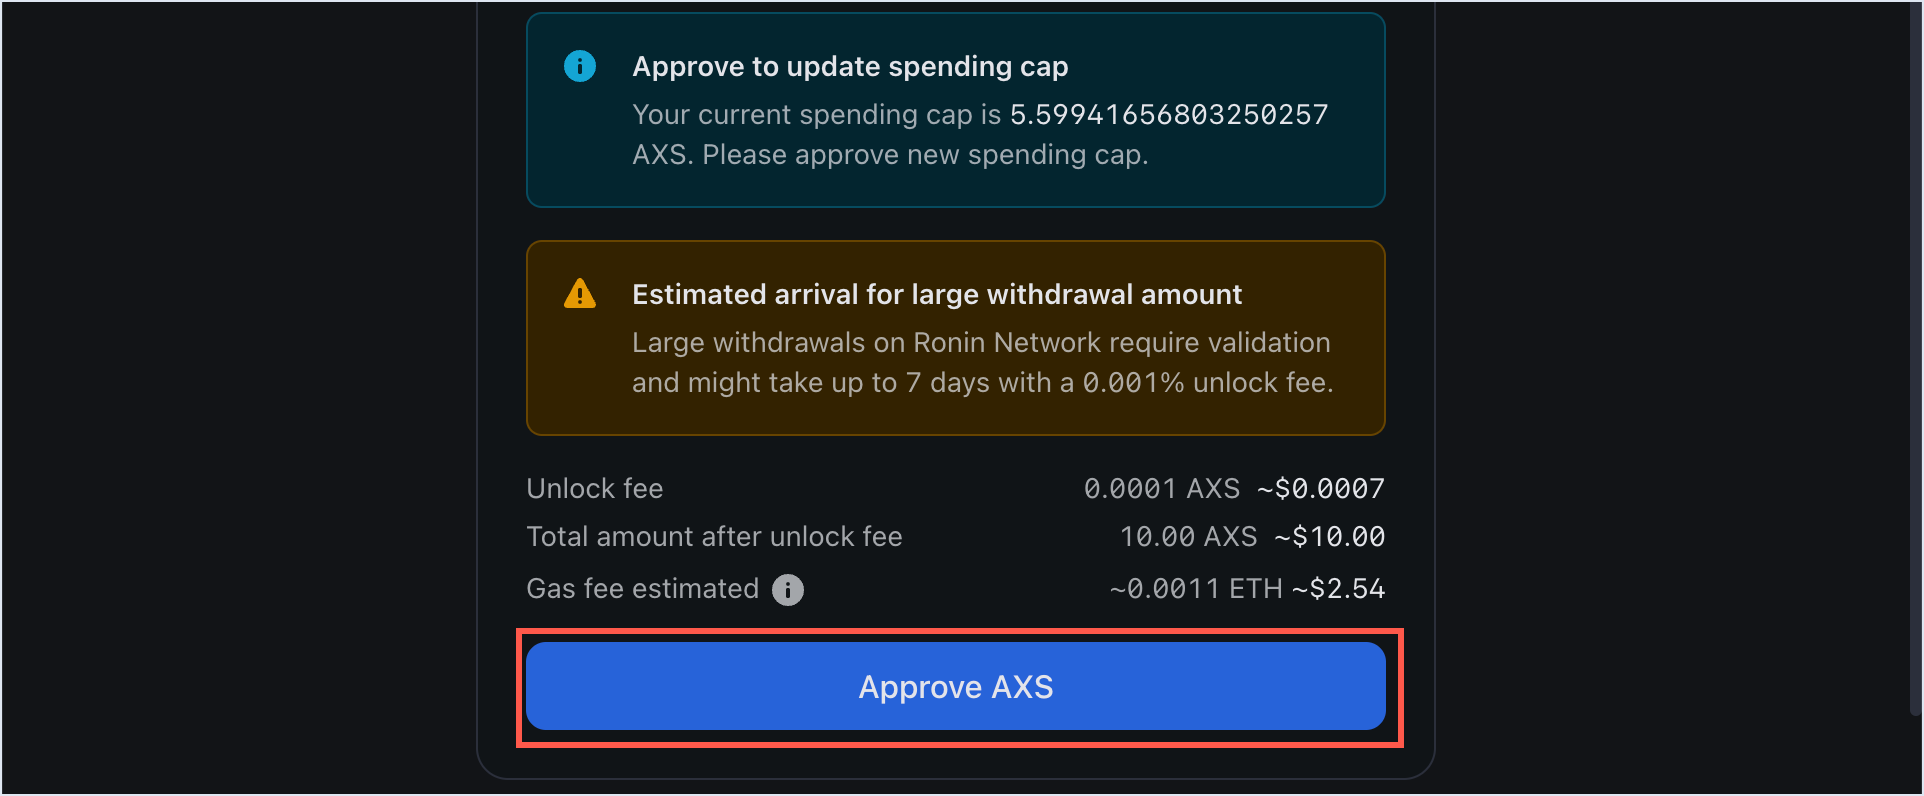
- When prompted, select Approve to approve the new spending cap for the selected token.
Spending cap
When you transfer an ERC20 token for the first time, you need to set a spending cap. To do that, enter your desired transfer amount, then follow instructions on the screen to approve the cap. When you make another transfer with the amount that exceeds your current cap, you will need to approve a new spending cap corresponding to the higher amount.
- When prompted, sign the transaction in your Ronin Wallet.
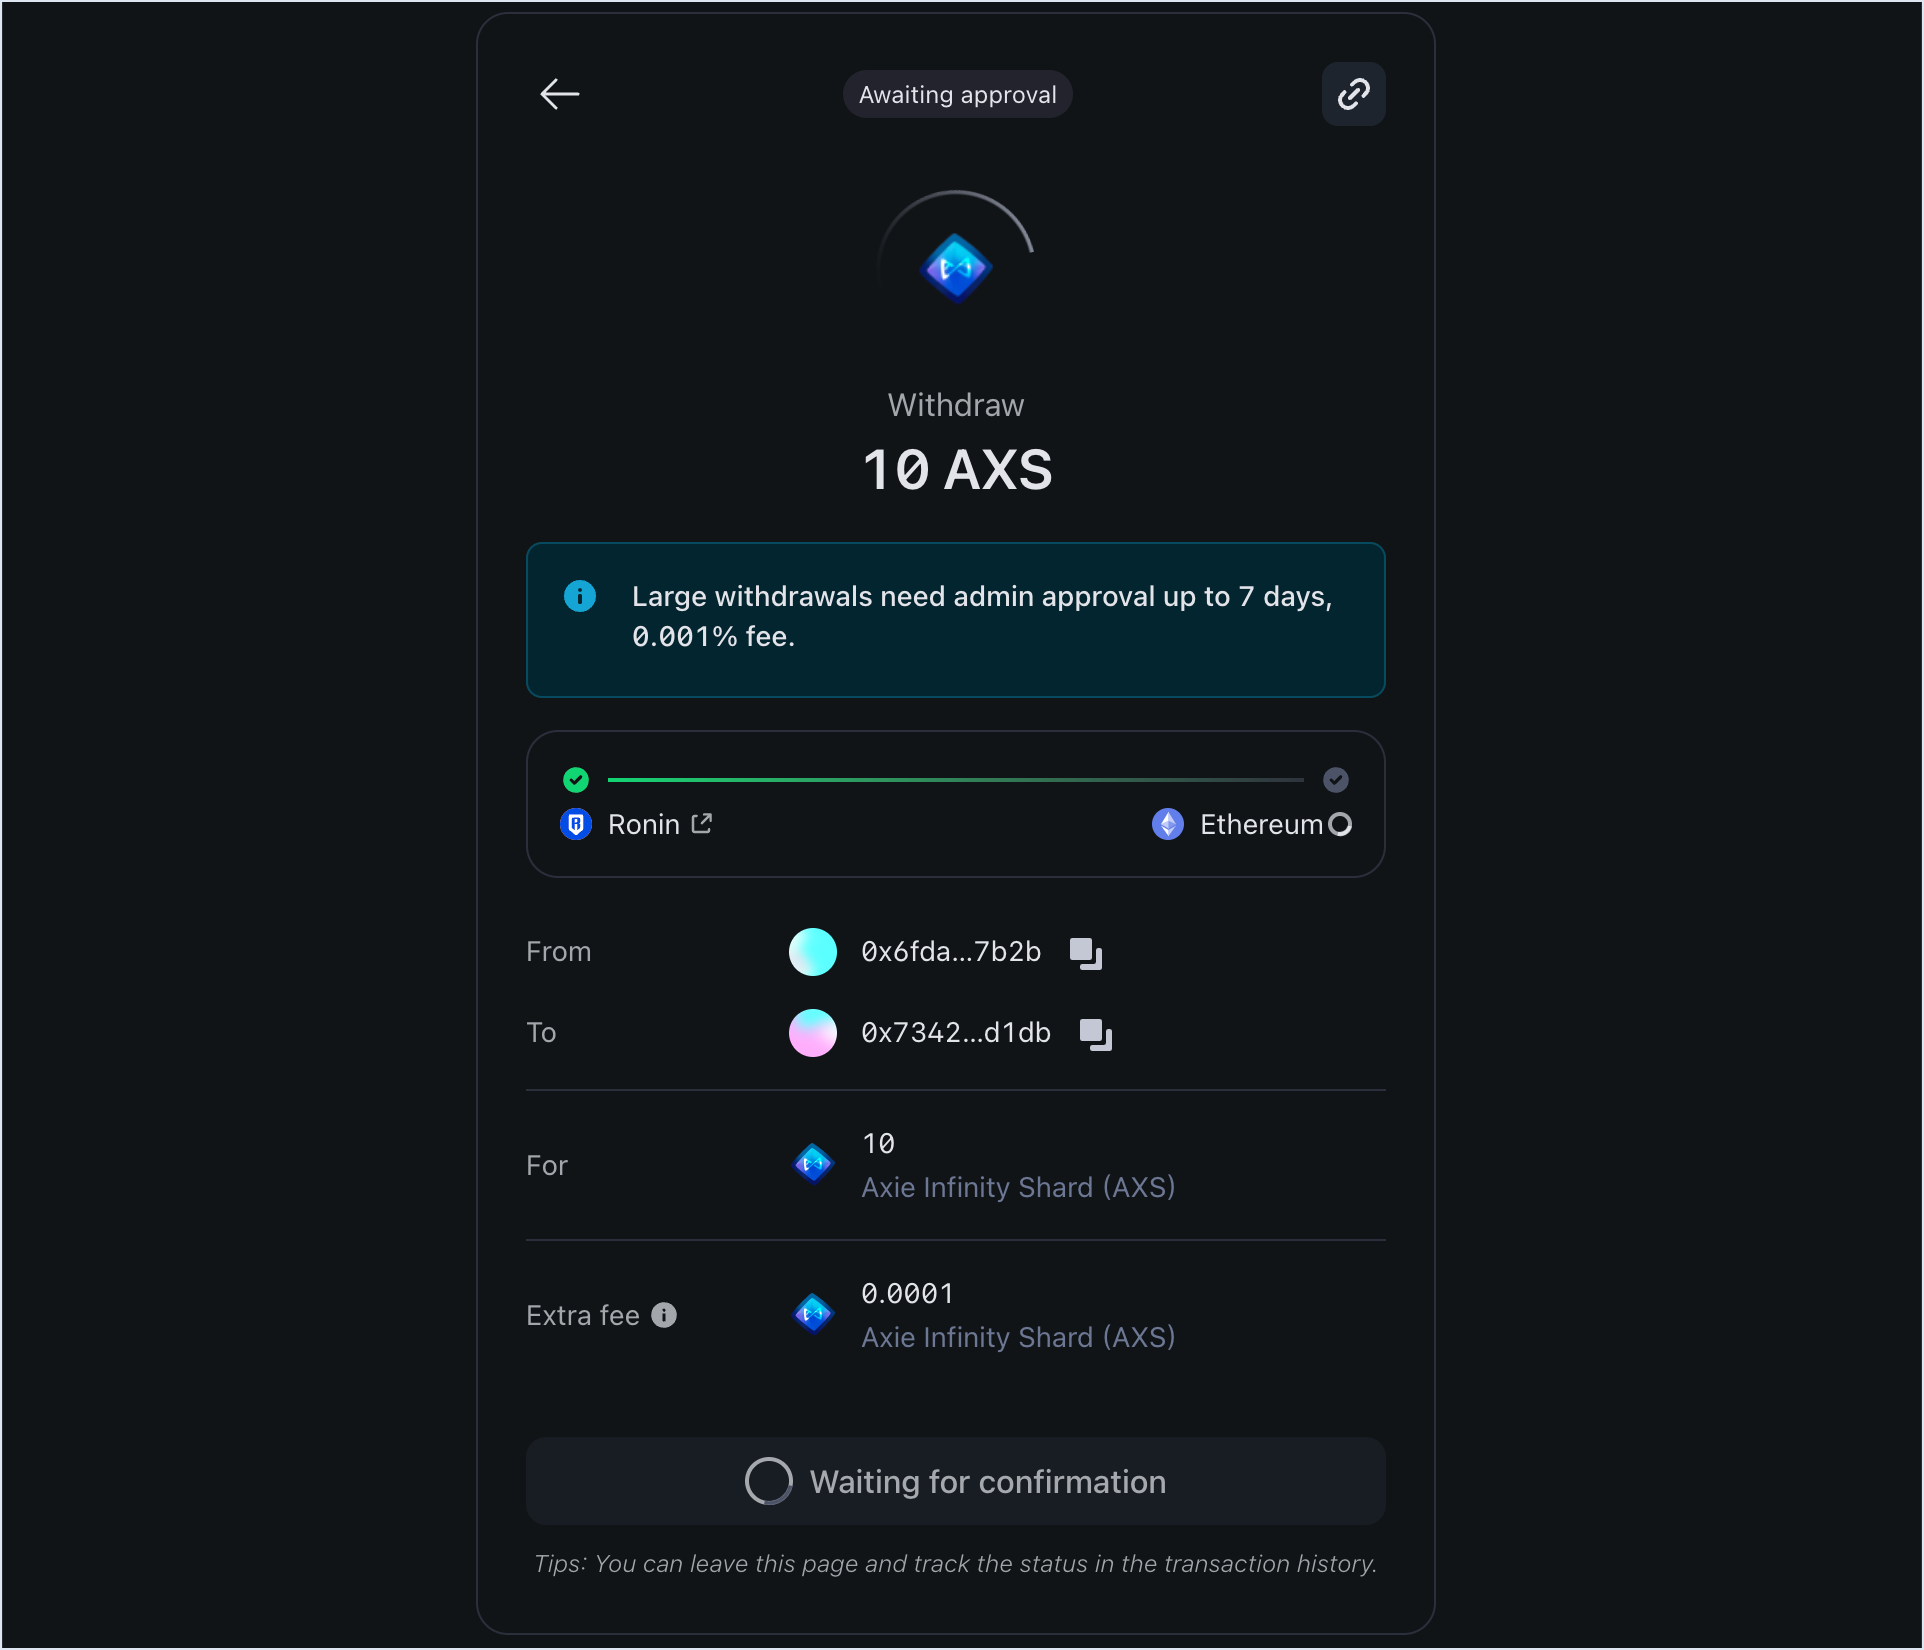
Step 3. Confirm your withdrawal
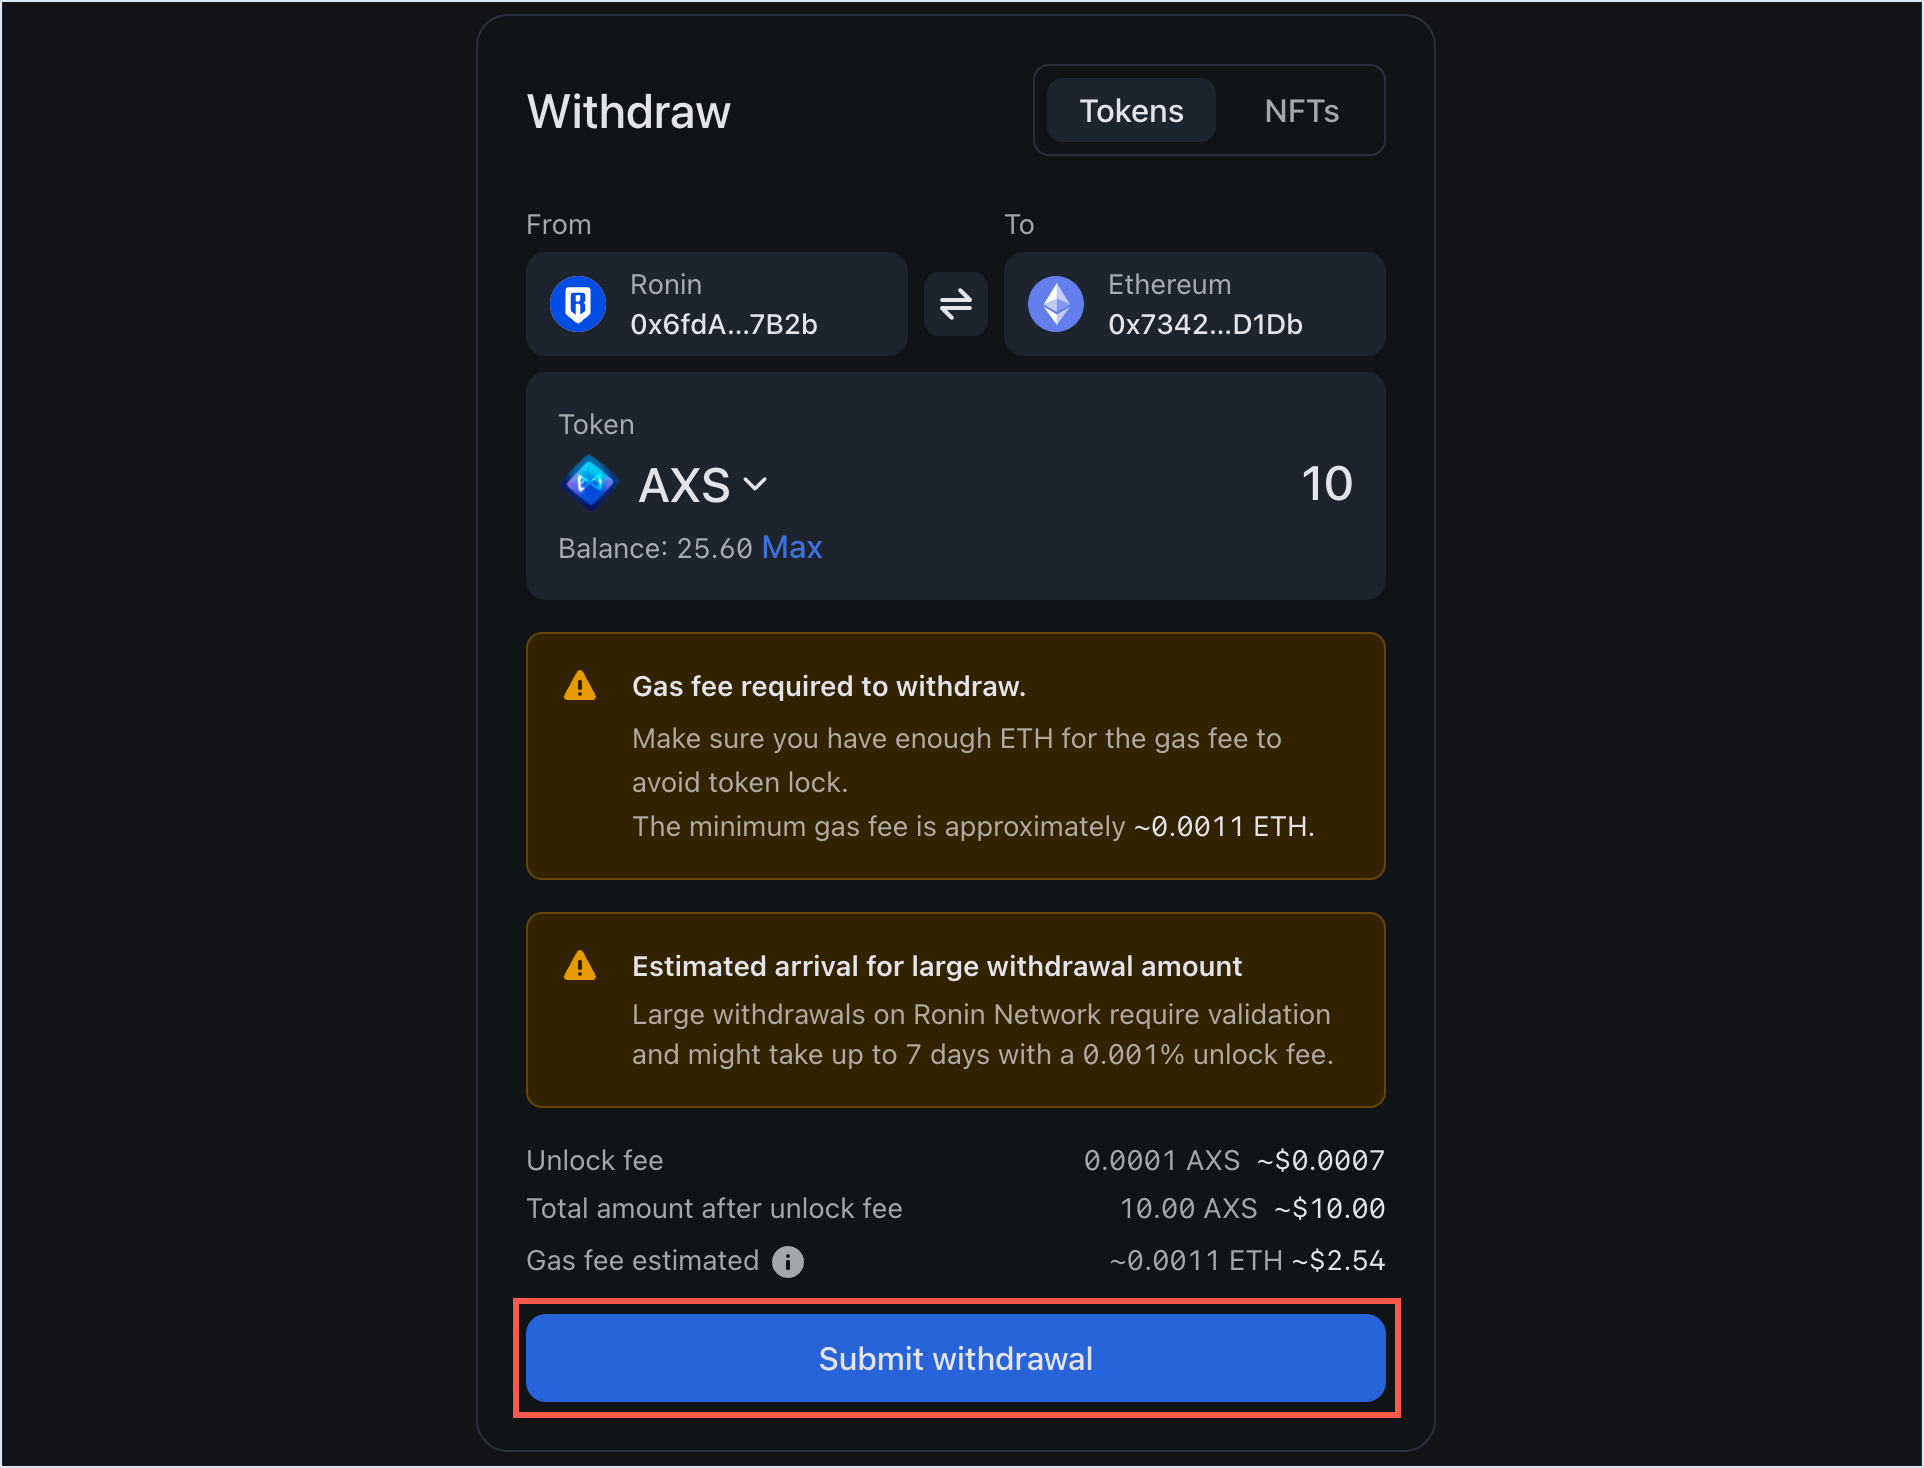
- Review the transaction details, including the gas fees associated with the withdrawal. Make sure you have enough ETH in your Ethereum wallet to cover the fees. If everything looks correct, select Submit withdrawal.
- When prompted, sign the transaction in your Ronin Wallet.
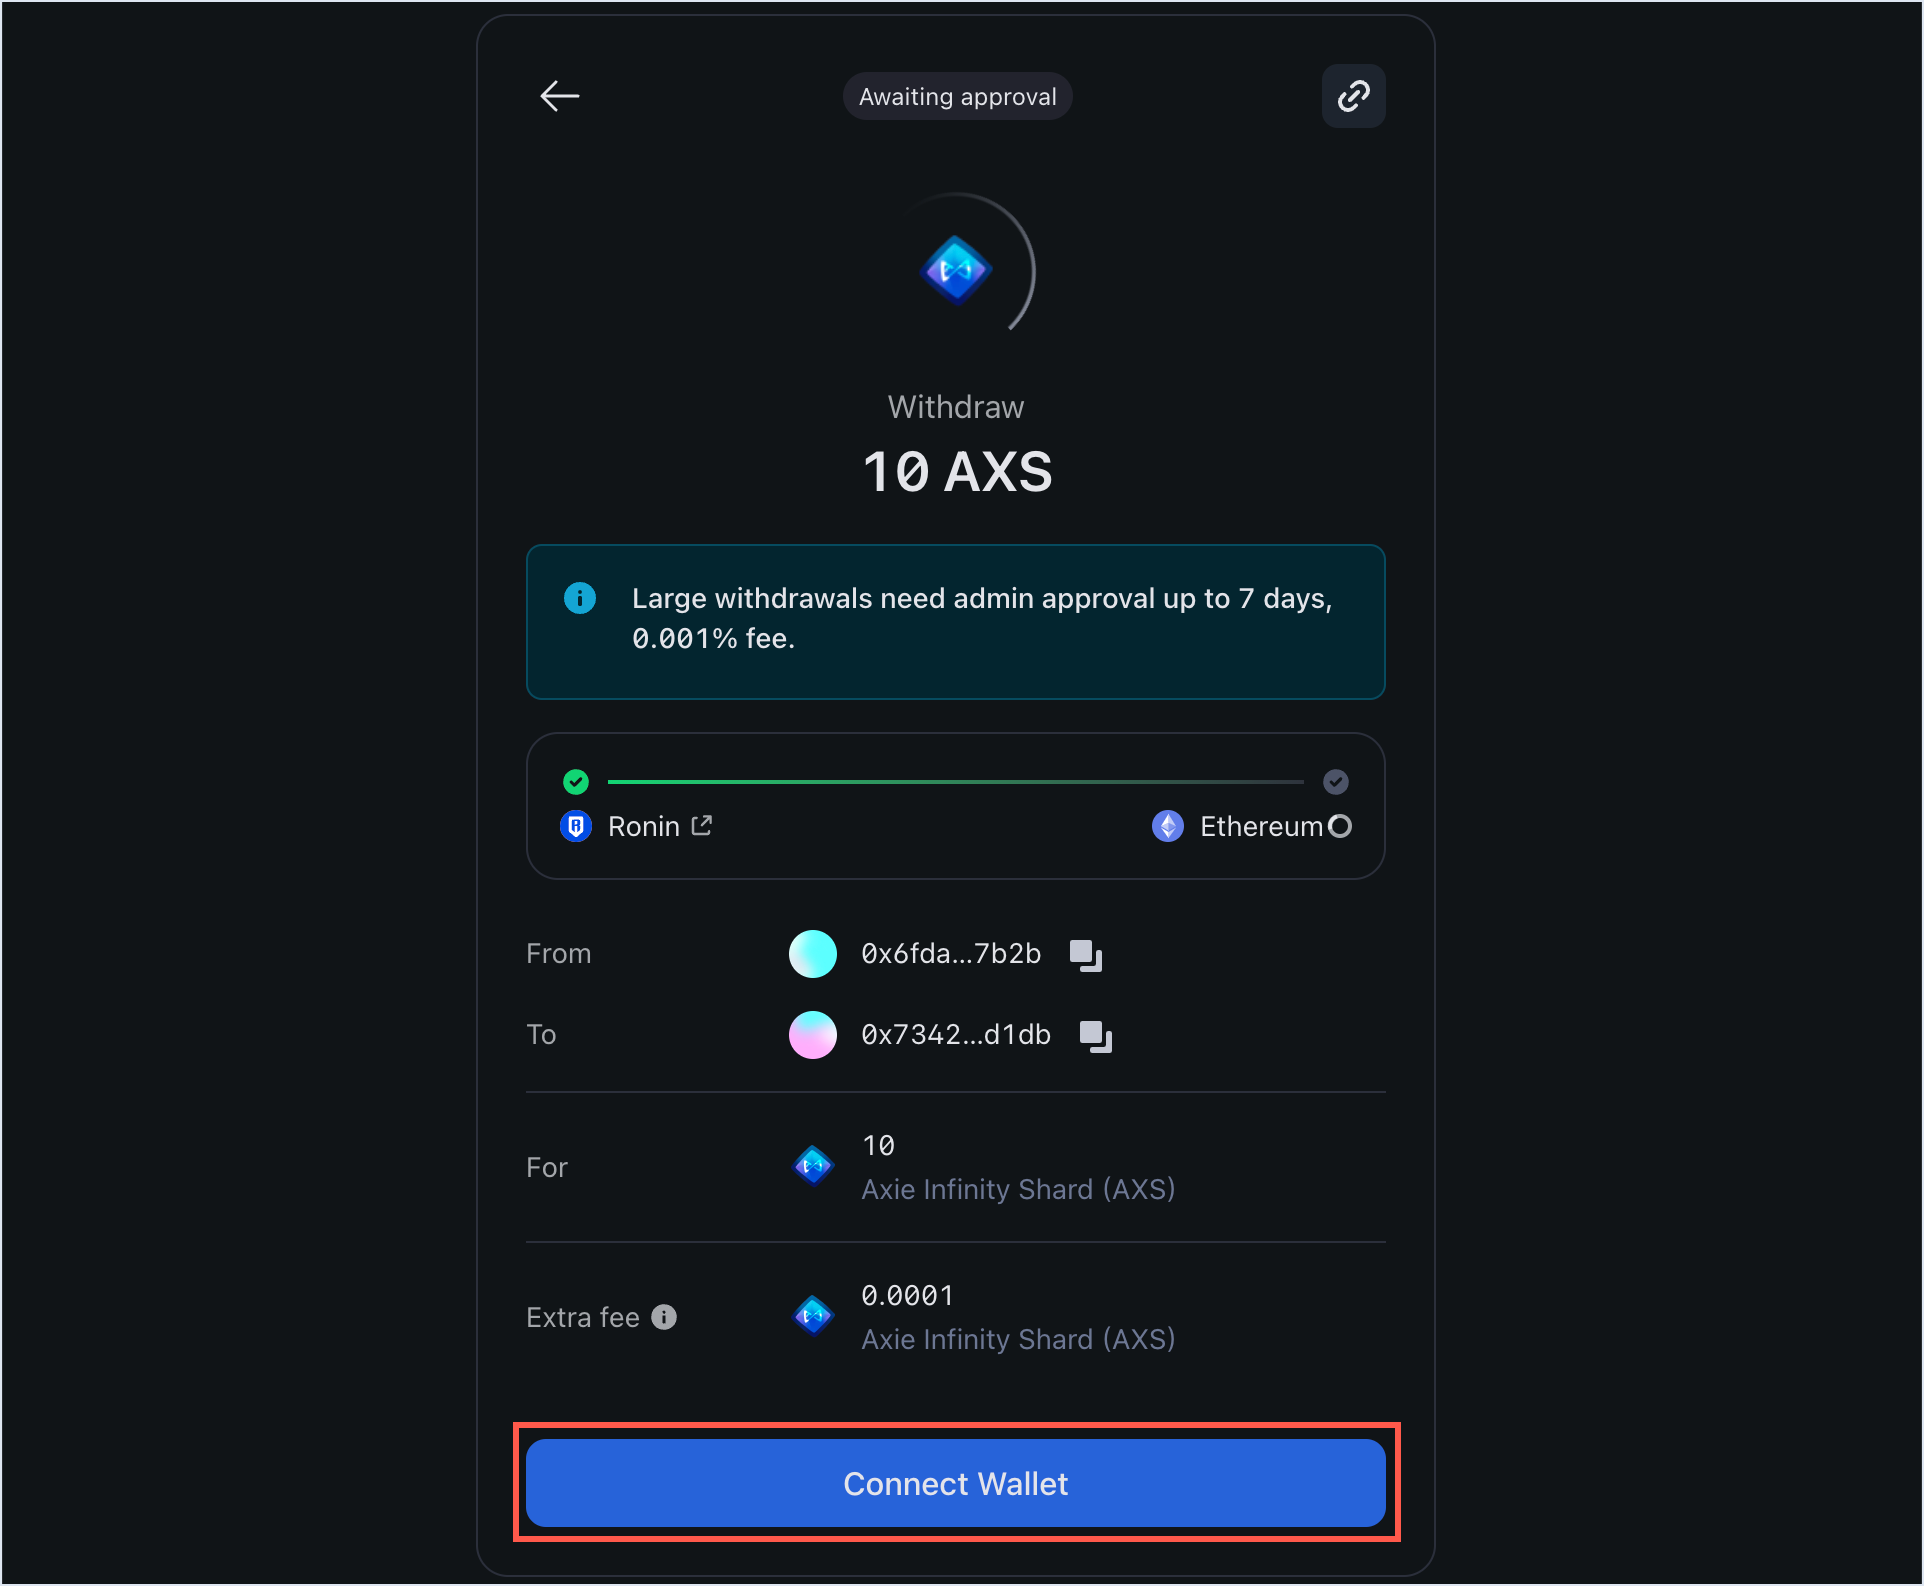
- Select Connect Wallet and connect your Ethereum wallet.
- Wait for the transaction to be confirmed by the network. Be patient, however, as transactions can take some time to complete, depending on network congestion and gas fees.
- When the amount is ready to be withdrawn, select Withdraw to transfer the tokens to your Ethereum address.
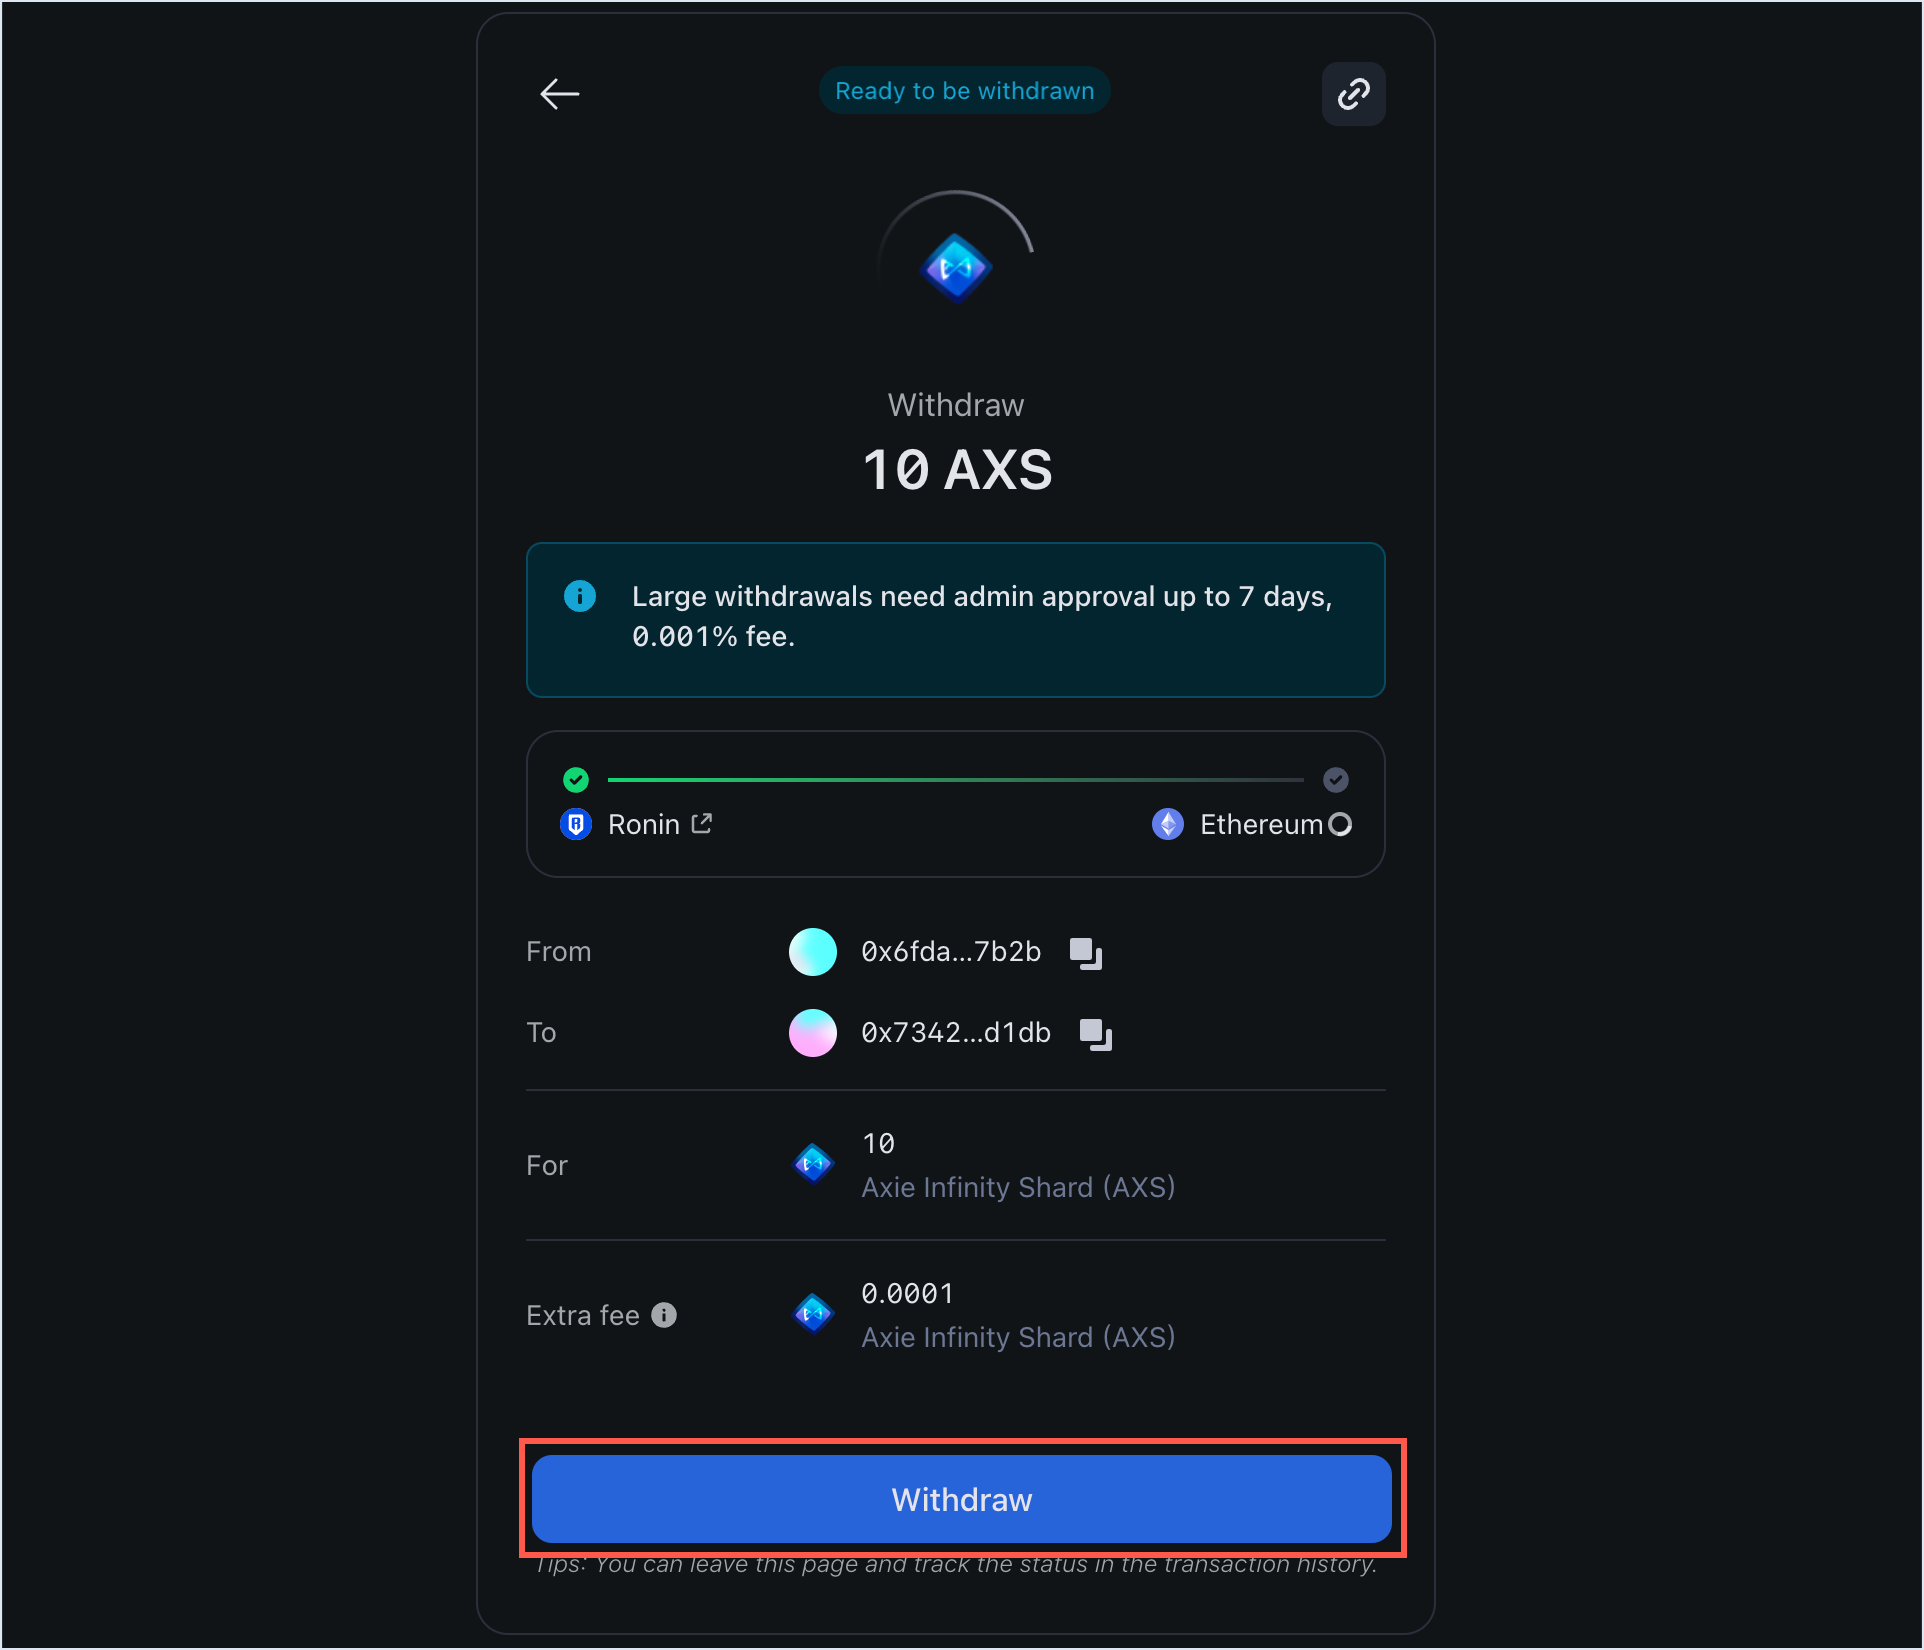
- When prompted, sign the transaction in your connected Ethereum wallet to receive the transfer.
Step 4. Receive the tokens in your Ethereum wallet
When the withdrawal is complete, you'll see a "Withdrawal completed" window.
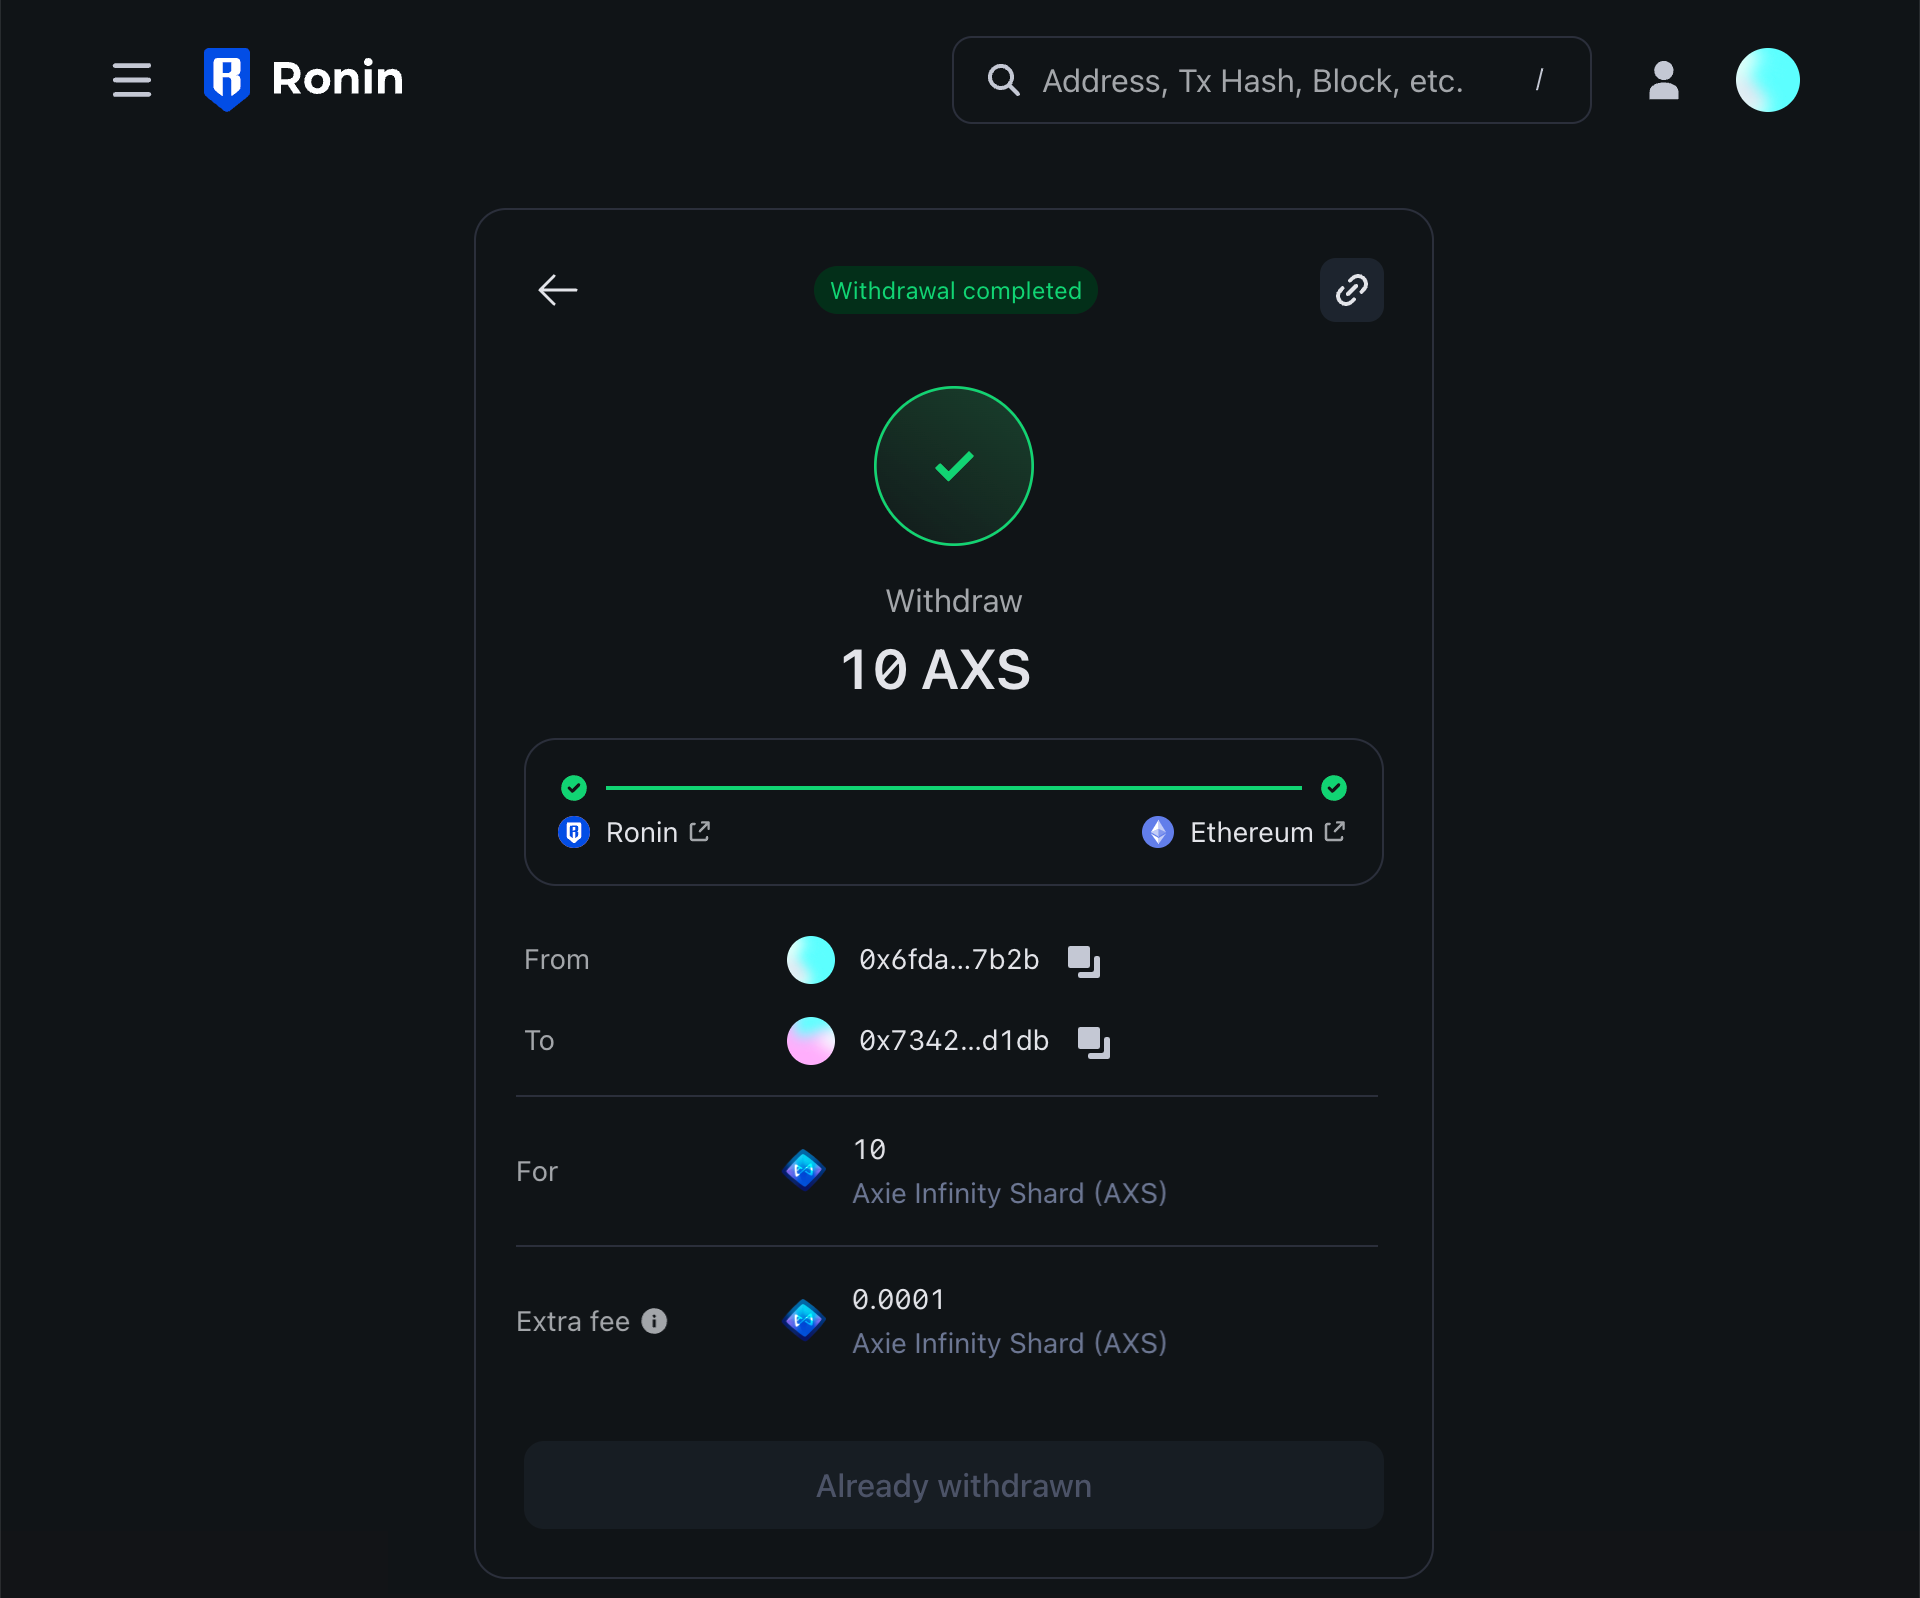 You can check your connected wallet to verify that the tokens have arrived successfully.